Scared of terraform apply? Use AWS Organizations!
01 January 2023
So you got your new job as a sole DevOps Engineer. Congratulations! For the first months your roam around your company's AWS. You see all the manually created EC2 instances, RDS databases, Elastic Load Balancers, etc. Well, they say a better practice is to use Infrastructure as Code than to manually create stuff.
So you learned Terraform. It's seems to be super effective. But now you have a
dilemma. All those staging servers together with production on the same VPC.
You barely understand what is what.
You decide to look for some documentation on company's internal wiki. Wow, previous
IT guy even created a repository with some Terraform files! You open it. But
there's no README, no comments, three files with 20 resources each. With
such code it's scary to run even terraform plan!
But you give yourself read-only access in IAM.
$ terraform plan
Terraform will perform the following actions:
(...)
Plan: 8 to add, 5 to change, 4 to destroy.
Not as bad as it seems but either way, it's better to just have a place to test without touching the production.
Welcome AWS Organizations
With AWS Organizations you can create a new subaccount that will share only the billing with the main (called management) account. Completely clean and new, without any resources. So let's dive in on how to get started.
But first some naming conventions to keep things clear:
- organization - the company you are employee of, so the single entity that is the cost center
- account - a structure that contains all the deployed AWS resources, such as EC2s, S3s, VPCs, Users...
- user - "credentials you use to log in" + "permissions in the account". One account can contain multiple users.
Creating a new subaccount
Sign in to AWS Console as a root or (better) as a user with Administrator permissions (if you have one). If you don't have access, ask your boss about it.
On the landing page, click Create an organization. Follow the instructions
to verify current account's e-mail address. (It is possible that it was done
already. In that case follow along.)
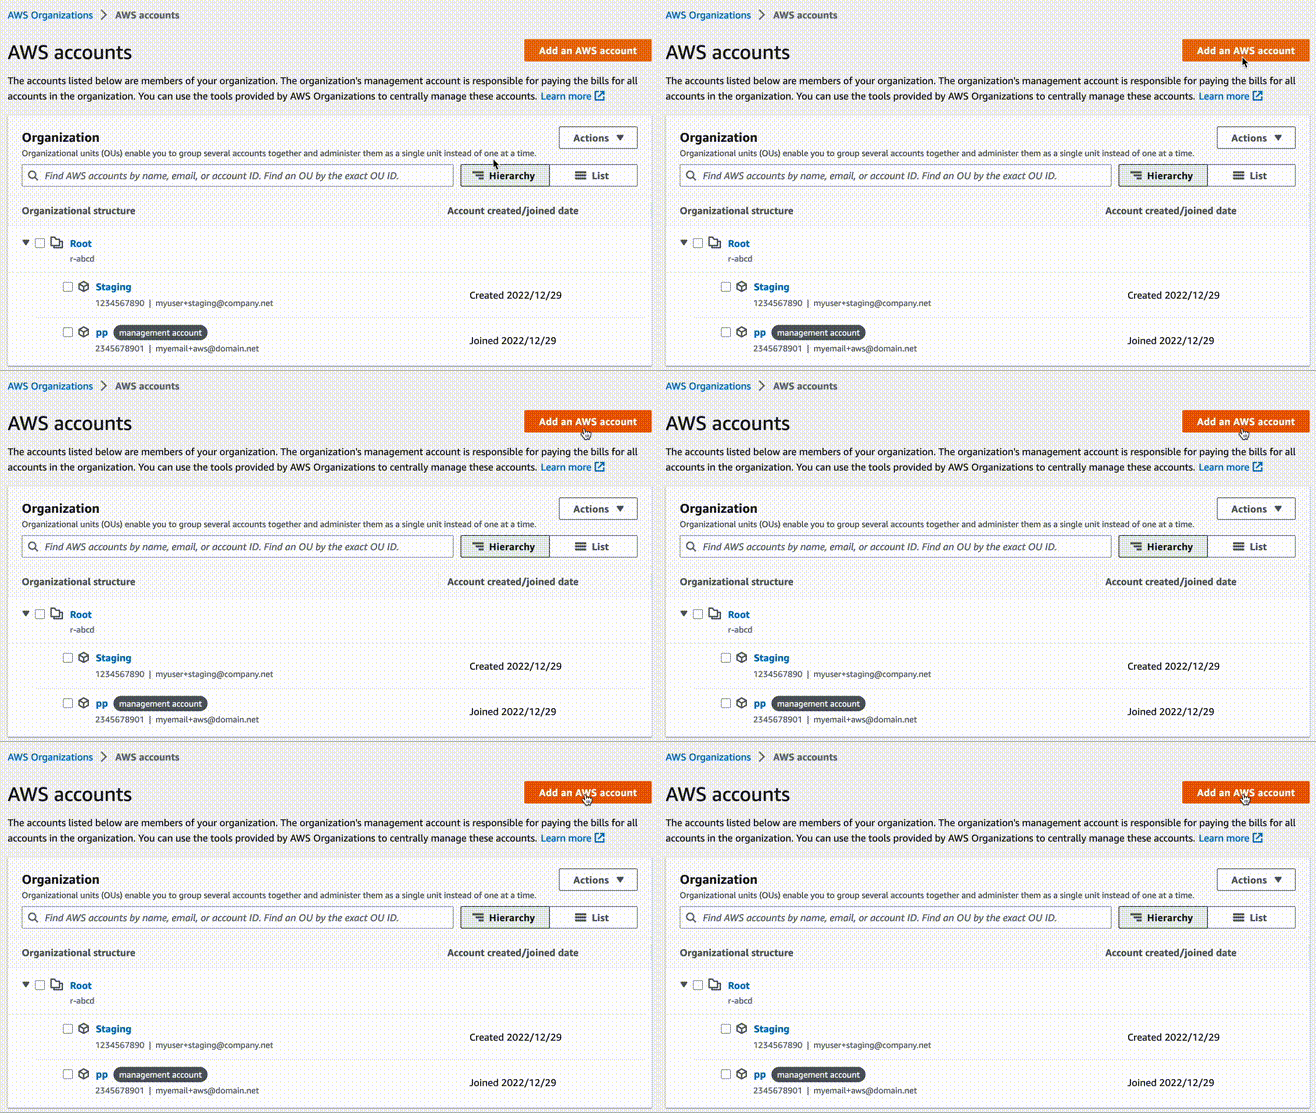
Click on AWS accounts on the left to see the list of accounts in the
organization. Here you should see the primary "management account". Click orange
button at the top Add an AWS account.
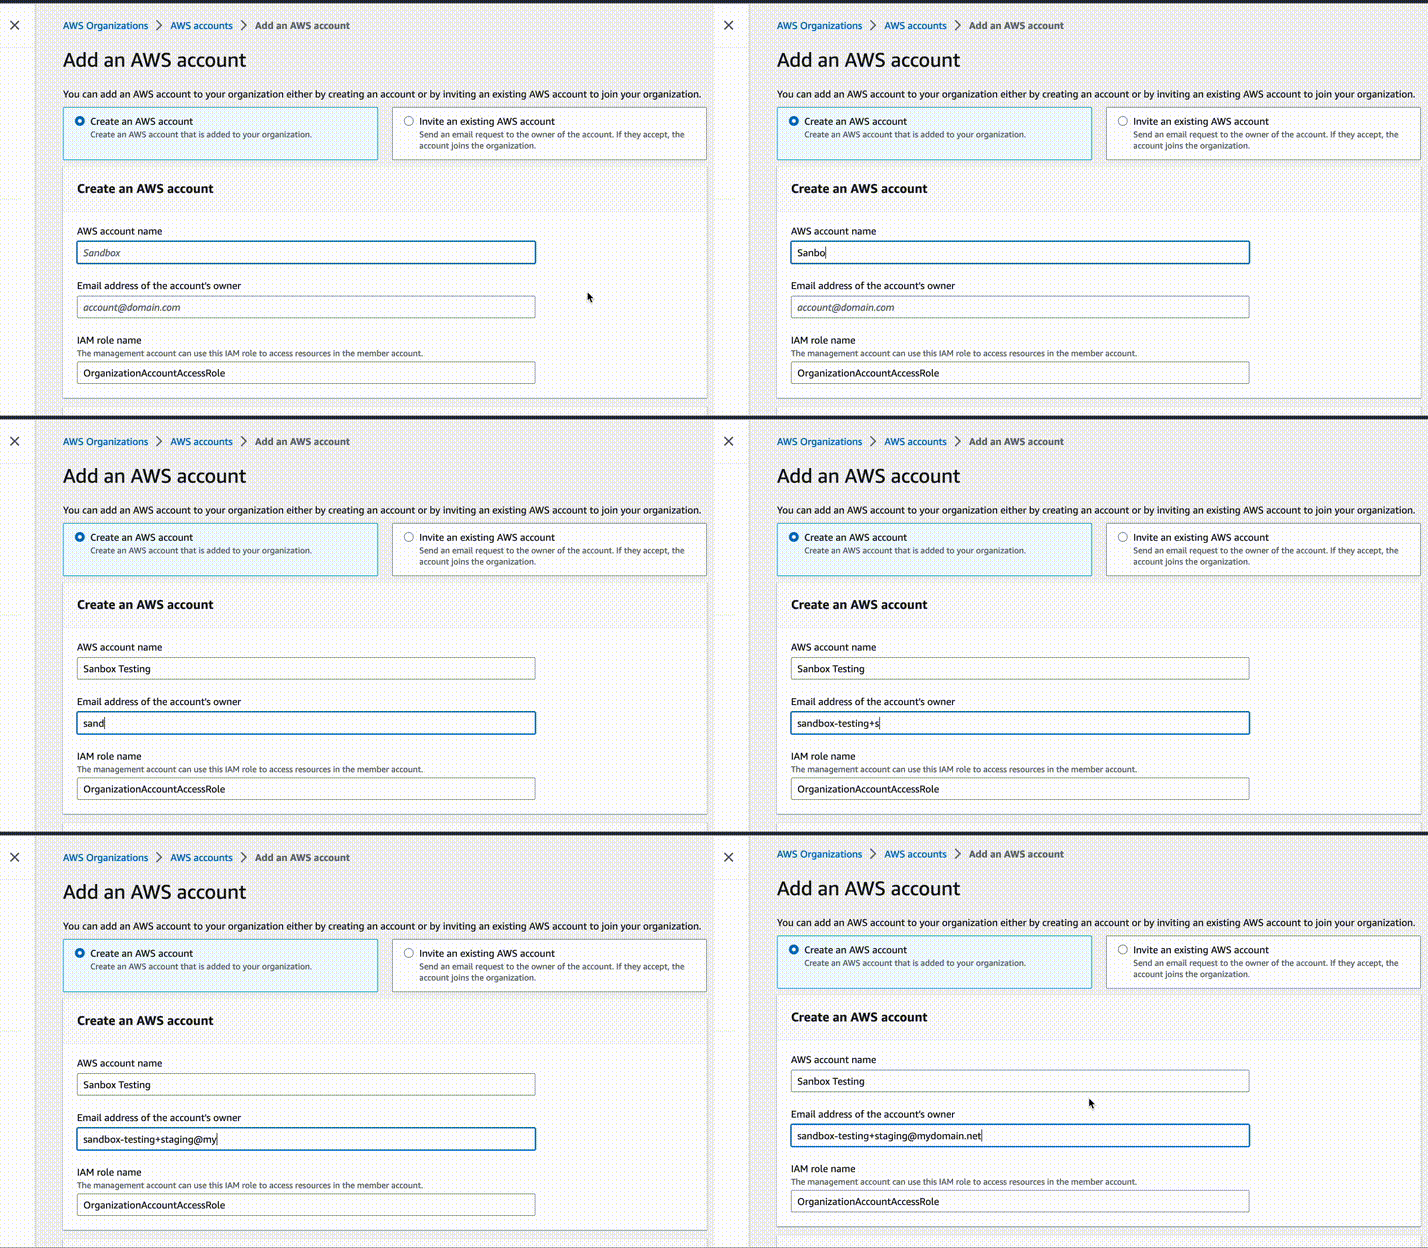
Create a name for the new account, for example Staging. Use e-mail address
to which you will have access, for example devops+staging@company.com. Leave IAM
role as default. After creation, write down the ID of this new account.
Accessing the new account
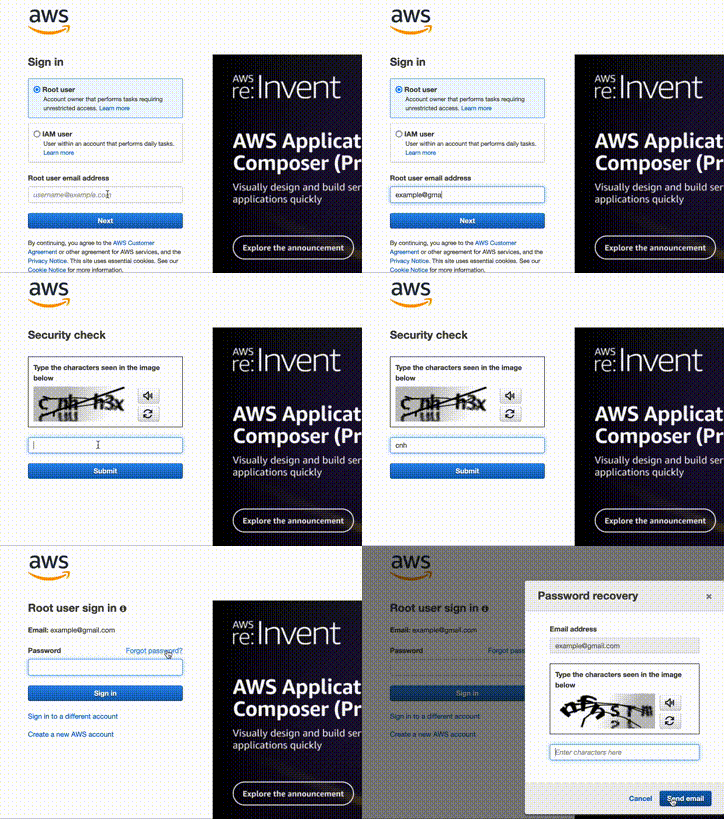
Now either log out from current AWS user or open a private/incognito window.
Head to AWS Console, select Root user, type the e-mail you have previously
given when creating a new account and select Forgot password. Copy link from
the e-mail and paste it into the current window. Create a strong password (using
a password manager like KeePass, 64 alphanumerics should be enough). Log in to
this new account.
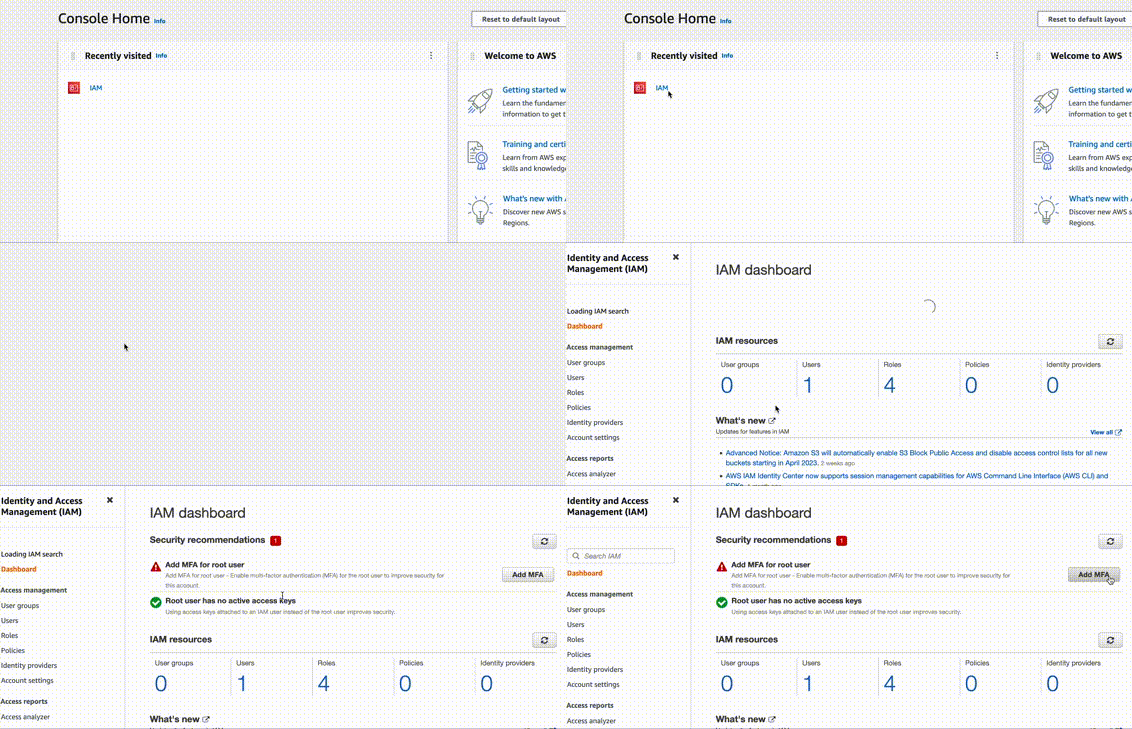
Head over to IAM and first thing is to set up the two-factor authentication for
the root. Click Add MFA next to the red warning sign and follow your preferred
method.
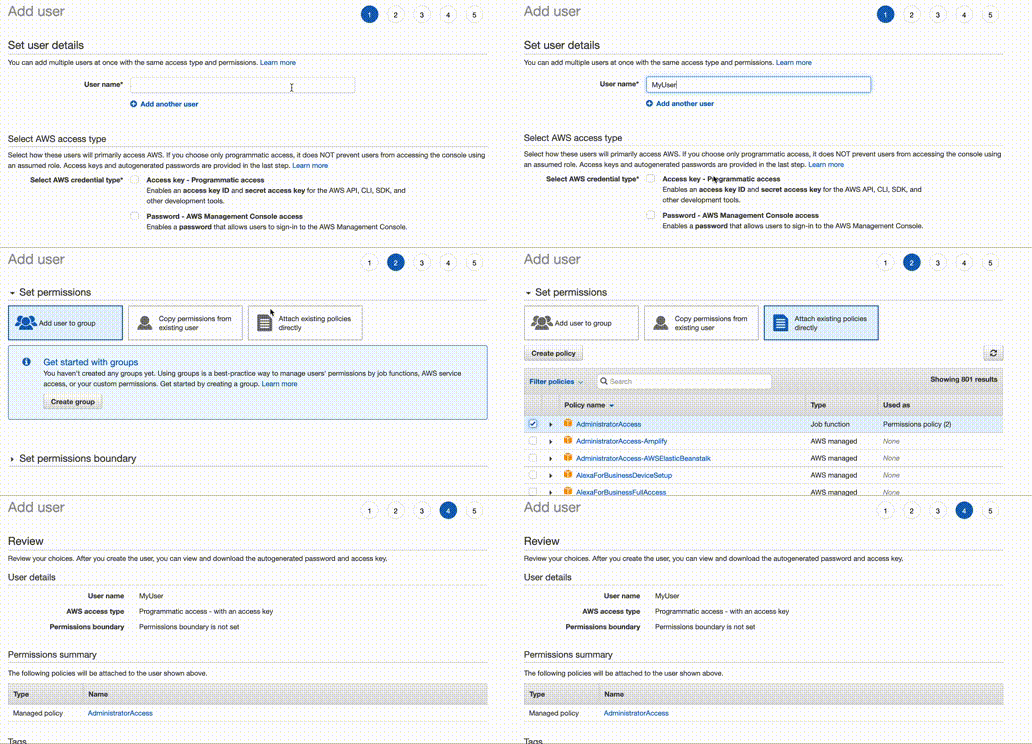
After securing your account, create a new user in IAM. As username use the same
work e-mail you usually use (+extension). Specify credential type - for
Terraform you need only programmatic access (and I would select only this box to
force myself to use IaC 😉). In the next step you can create a group to keep
things clean and organized but you can also attach policy directly. In either
case what we need now is AdministratorAccess policy. Get your API keys, store
them in a safe place (like password manager) and log out from the root user (and
never log in again unless emergencies, keep credentials to root user where you
keep your gold).
Another approach is to give the new AdministratorAccess user also console
access, activate two-factor authentication and create users with less
permissions to use with Terraform. In either case, be very careful about your
credentials. Don't save them directly in ~/.aws/credentials - for these high
privileges, prefer to use environment variables and clean .bash_history
regularly.
Verify if everything works as expected
Now you can verify that you are indeed using the correct account to be on the
safe side. Configure the new credentials in ~/.aws/credentials or better use
them as
environment variables.
If you have
AWS CLI
installed, you can run aws sts get-caller-identity to get current account ID.
$ aws sts get-caller-identity
{
    "UserId": "AIDAABCDEFGHI",
    "Account": "01234567890",
    "Arn": "arn:aws:iam::01234567890:user/myuser@domain.net"
}
To verify the same thing with Terraform, create a new empty directory with
main.tf containing: provider configuration, data source aws_caller_identity
and output for account_id.
terraform {
  required_providers {
    aws = {}
  }
}

provider "aws" {
  region = "eu-central-1"
}

data "aws_caller_identity" "current" {}

output "account_id" {
  value = data.aws_caller_identity.current.account_id
}
Run terraform init and terraform plan. If you have set the environment
variables (or have the credentials in file) you should already see the account
ID from the output in the plan.
Deal with existing infrastructure code
If you found some code and you are unsure of how it works, you can also test it
on this new account. Navigate to its directory. If the code uses local state
file, you can use
Terraform workspace
to create a clean one without losing the old one.
If it uses shared place like S3, you can change the storage to local, or create a new bucket in new account and change the path. Terraform will create a new empty state (with credentials from a different account it is rather not likely that the current S3 bucket will be accessible although it is possible).