Deploy SmartFox Server using Ansible - Part 1
10 January 2023
SmartFoxServer is a software that acts as a framework for building backend for online games. It lets game developers to focus on the gameplay, while SmartFox takes care of connection, authentication, room management, in-game chat, etc. It is very simple to install and configure. I shouldn't need to introduce Ansible - with Ansible, which is a configuration management and automation tool, we can make the process documented, repeatable and human-readable.
In the series of these posts, I would like to lead from creating a simple, single-purpose Ansible playbook into a reusable Ansible role. This post assumes that you have basic knowledge of Linux, YAML and some experience with Ansible.
Repository for this post is available on GitHub: ppabis/smartfox-ansible-part1. Each step in this post is a separate commit.
Plan
Let's plan out our playbook. The tasks we need to do in order to have a working SmartFox server are the following:
- prepare the environment
- download and extract SmartFox
- configure the server
- install SmartFox as a service
For each of these tasks we can create a separate YAML file in a subdirectory. So
let's create a new directory for our playbook, for example
~/Projects/Smartfox-Ansible, and init Git there.
$ mkdir ~/Projects/Smartfox-Ansible
$ cd ~/Projects/Smartfox-Ansible
$ git init
Then create a tasks, templates, files and vars directories.
$ mkdir tasks
$ mkdir vars
$ mkdir files
$ mkdir templates
And file for each of the mentioned points in the plan.
$ touch tasks/prepare-environment.yml
$ touch tasks/download-smartfox.yml
$ touch tasks/configure-smartfox.yml
$ touch tasks/install-smartfox.yml
We can commit these files into our repo and open favorite editor such as Vim or VS Code.
Task 1: Preparing the environment
First thing is to prepare the target system, install necessary software that we will need in later stages and to create a separate user for running the server process.
I will focus only on Debian/Ubuntu with x86 architecture. In case of Ansible on
these systems we have to be sure that acl is installed. Also unzip will be
needed to extract the archive with SmartFox. Our first tasks file will look
something like this:
---
- name: Install unzip and acl (Debian/Ubuntu)
  apt:
    name:
      - unzip
      - acl
    state: present

- name: Ensure user smartfox exists
  user:
    name: "smartfox"
    shell: /bin/false
    home: "/opt/smartfox"
    state: present
    system: yes
The names above each task explain what each task is doing. The user smartfox
will not have a shell, as it will be only used for starting SmartFox process.
This will be the contents of tasks/prepare-environment.yml.
Task 2: Downloading and extracting SmartFox
Let's define a variable that will specify which SmartFox version we want to
download. Create a variable in vars/smartfox.yml.
---
smartfox_version: "2.18.0"
In tasks/download-smartfox.yml we will create a task of downloading and
extracting. (Remember to
read the license
before you use the server.)
---
- name: Download SmartFox 2X
  get_url:
    url: "https://smartfoxserver.com/downloads/sfs2x/SFS2X_unix_{{ smartfox_version | replace('.', '_') }}.tar.gz"
    dest: "/tmp"
    mode: 0644
    owner: "smartfox"
    group: "smartfox"
  register: smartfox_archive_tmp

- name: Extract SmartFox
  unarchive:
    src: "{{ smartfox_archive_tmp.dest }}"
    dest: "/opt/smartfox"
    remote_src: yes
    owner: "smartfox"
    group: "smartfox"
    mode: 0755
    creates: "/opt/smartfox/SmartFoxServer_2X/SFS2X/lib/sfs2x-core.jar"
The {{ }} will substitute its contents with the variable inside and
| replace(...) next to it will run replace function on the thing on the left,
so in our case we want to change . to _ in order to have a correct file
name. register: will store the output of the get_url task into
smartfox_archive_tmp. We then use the property dest of this output in
unarchive task. creates: prevents from extracting the archive again if file
sfs2x-core.jar exists - if it does, that means that the archive must have been
extracted already. Otherwise it would overwrite all changes that we made.
Task 3: Configuring basic parameters
To configure the server we will use Jinja templates. They use the same double
braces expressions as above. Extract two files from the SmartFox archive:
config/server.xml and lib/apache-tomcat/conf/server.xml. Place them in
templates directory of our repo and rename smartfox_server.xml.j2 and
tomcat_server.xml.j2 respectively.
Now edit the two files in the following places by putting Jinja variables, which
are our admin credentials. In smartfox_server.xml.j2:
[...]
<remoteAdmin>
    <administrators>
      <adminUser>
        <login>{{ smartfox_admin_user }}</login>
        <password>{{ smartfox_admin_password }}</password>
      </adminUser>
    </administrators>
[...]
As we can see in the XML config there are a lot more parameters but I will leave it just at that for now. In the Tomcat file, replace the following lines with template variables (added line breaks inside the tag for clarity):
[...]
<Connector
    SSLEnabled="true"
    clientAuth="false"
    keystoreFile="lib/apache-tomcat/conf/{{ smartfox_ssl_keystore_file if smartfox_ssl_keystore_file != "" else "keystore.jks" }}"
    keystorePass="{{ smartfox_ssl_keystore_password if smartfox_ssl_keystore_file != "" else "password" }}"
    maxConnections="10000"
    maxThreads="200"
    name="sfs-https"
    port="8443"
    protocol="org.apache.coyote.http11.Http11NioProtocol"
    scheme="https" secure="true"
    sslProtocol="TLSv1.2"
/>
[...]
This config will check if the variable smartfox_ssl_keystore_file is not an
empty string and use this custom keystore. Otherwise it will default to the
example keystore and password. For production uses, this must be provided. Also
note the change to sslProtocol that will enforce TLS 1.2.
The next thing is to add four of the variables mentioned above to
vars/smartfox.yml. In your file use your own password (this variables file
is not yet production-grade, but feel free to explore ansible-vault):
---
smartfox_version: "2.18.0"
smartfox_ssl_keystore_file: mykeystore.jks
smartfox_ssl_keystore_password: VeRySeCrEtPa5s
smartfox_admin_user: Gamemaster
smartfox_admin_password: G4M3mast3r
If we want to use our own keystore, we need to generate it. In files
directory, we would need mykeystore.jks. We can generate it using keytool
which is part of Java Development Kit. (For production/real certificate, we may
use the
following Tomcat documentation page.
$ keytool -genkey -alias selfsigned -keyalg RSA -keystore files/mykeystore.jks
When asked for first and last name, type the domain you are planning to use
(this is when keytool asks for common name). We can also use a made up domain
like smartfox.local and insert it into our /etc/hosts file along with IP
(add there temporarily new line like 172.28.1.2 smartfox.local).
Now it's time to glue all the parts together. To fill the Jinja templates, we
will use Ansible built in module template which will match variables visible
by Ansible to the ones referenced in the templates. Our task file will look like
this:
---
- name: Copy server.xml configuration (admin)
  template:
    src: templates/smartfox_server.xml.j2
    dest: "/opt/smartfox/SmartFoxServer_2X/SFS2X/config/server.xml"
    owner: "smartfox"
    group: "smartfox"
    mode: 0660

- name: Copy tomcat.xml configuration
  template:
    src: templates/tomcat_server.xml.j2
    dest: "/opt/smartfox/SmartFoxServer_2X/SFS2X/lib/apache-tomcat/conf/server.xml"
    owner: "smartfox"
    group: "smartfox"
    mode: 0660

- name: Copy keystore to tomcat directory
  copy:
    src: "files/{{ smartfox_ssl_keystore_file }}"
    dest: "/opt/smartfox/SmartFoxServer_2X/SFS2X/lib/apache-tomcat/conf/{{ smartfox_ssl_keystore_file }}"
    owner: "smartfox"
    group: "smartfox"
    mode: 0400
  when: smartfox_ssl_keystore_file != ""
We will name this file tasks/configure-smartfox.yml.
Task 4: Installing SmartFox as a systemd service
This task is to ensure that SmartFox will be started when the OS starts, so in
case of reboot, it will be accessible again without the need to log in to the
machine. Let's put the file smartfox.service into our files/ directory with
the following contents:
[Unit]
Description=SmartFoxServer 2X
After=network.target

[Service]
Type=forking
User=smartfox
LimitNOFILE=100000
WorkingDirectory=/opt/smartfox/SmartFoxServer_2X/SFS2X
ExecStart=/opt/smartfox/SmartFoxServer_2X/SFS2X/sfs2x-service start
ExecStop=/opt/smartfox/SmartFoxServer_2X/SFS2X/sfs2x-service stop
Restart=on-abort

[Install]
WantedBy=multi-user.target
We need to use type forking because sfs2x-service script does spawn a child
process but exits itself. LimitNOFILE ensures that internal SmartFox processes
do not fail when reaching system's default open file handles limit.
Ansible would need to copy this file and then enable the service in systemd. To
do this we need to specify also daemon_reload because of the change in
available systemd units. enabled, despite the name, will cause the service to
start on boot. In file tasks/install-smartfox.yml:
- name: Copy SmartFox systemd service file
  copy:
    src: files/smartfox.service
    dest: /etc/systemd/system/smartfox.service
    owner: root
    group: root
    mode: 0644

- name: Enable SmartFox service on boot
  systemd:
    name: smartfox
    enabled: yes
    daemon_reload: yes
    state: started
Putting it all together
Now it's time to create our main playbook, where we will import all the variables and tasks.
---
- hosts: all
  become: yes

  vars_files:
    - vars/smartfox.yml

  tasks:
    - import_tasks: tasks/prepare-environment.yml
    - import_tasks: tasks/download-smartfox.yml
    - import_tasks: tasks/configure-smartfox.yml
    - import_tasks: tasks/install-smartfox.yml
Testing out
Create inventory file with IP of the target machine and run
ansible-playbook -i inventory playbook.yml. When everything goes well, we can
test connection to our new server by typing its public IP, hostname and port
8443. Also ensure that the port is open in the firewall. Go to the IP of your
target machine prefixed by https:// and :8443 at the end or
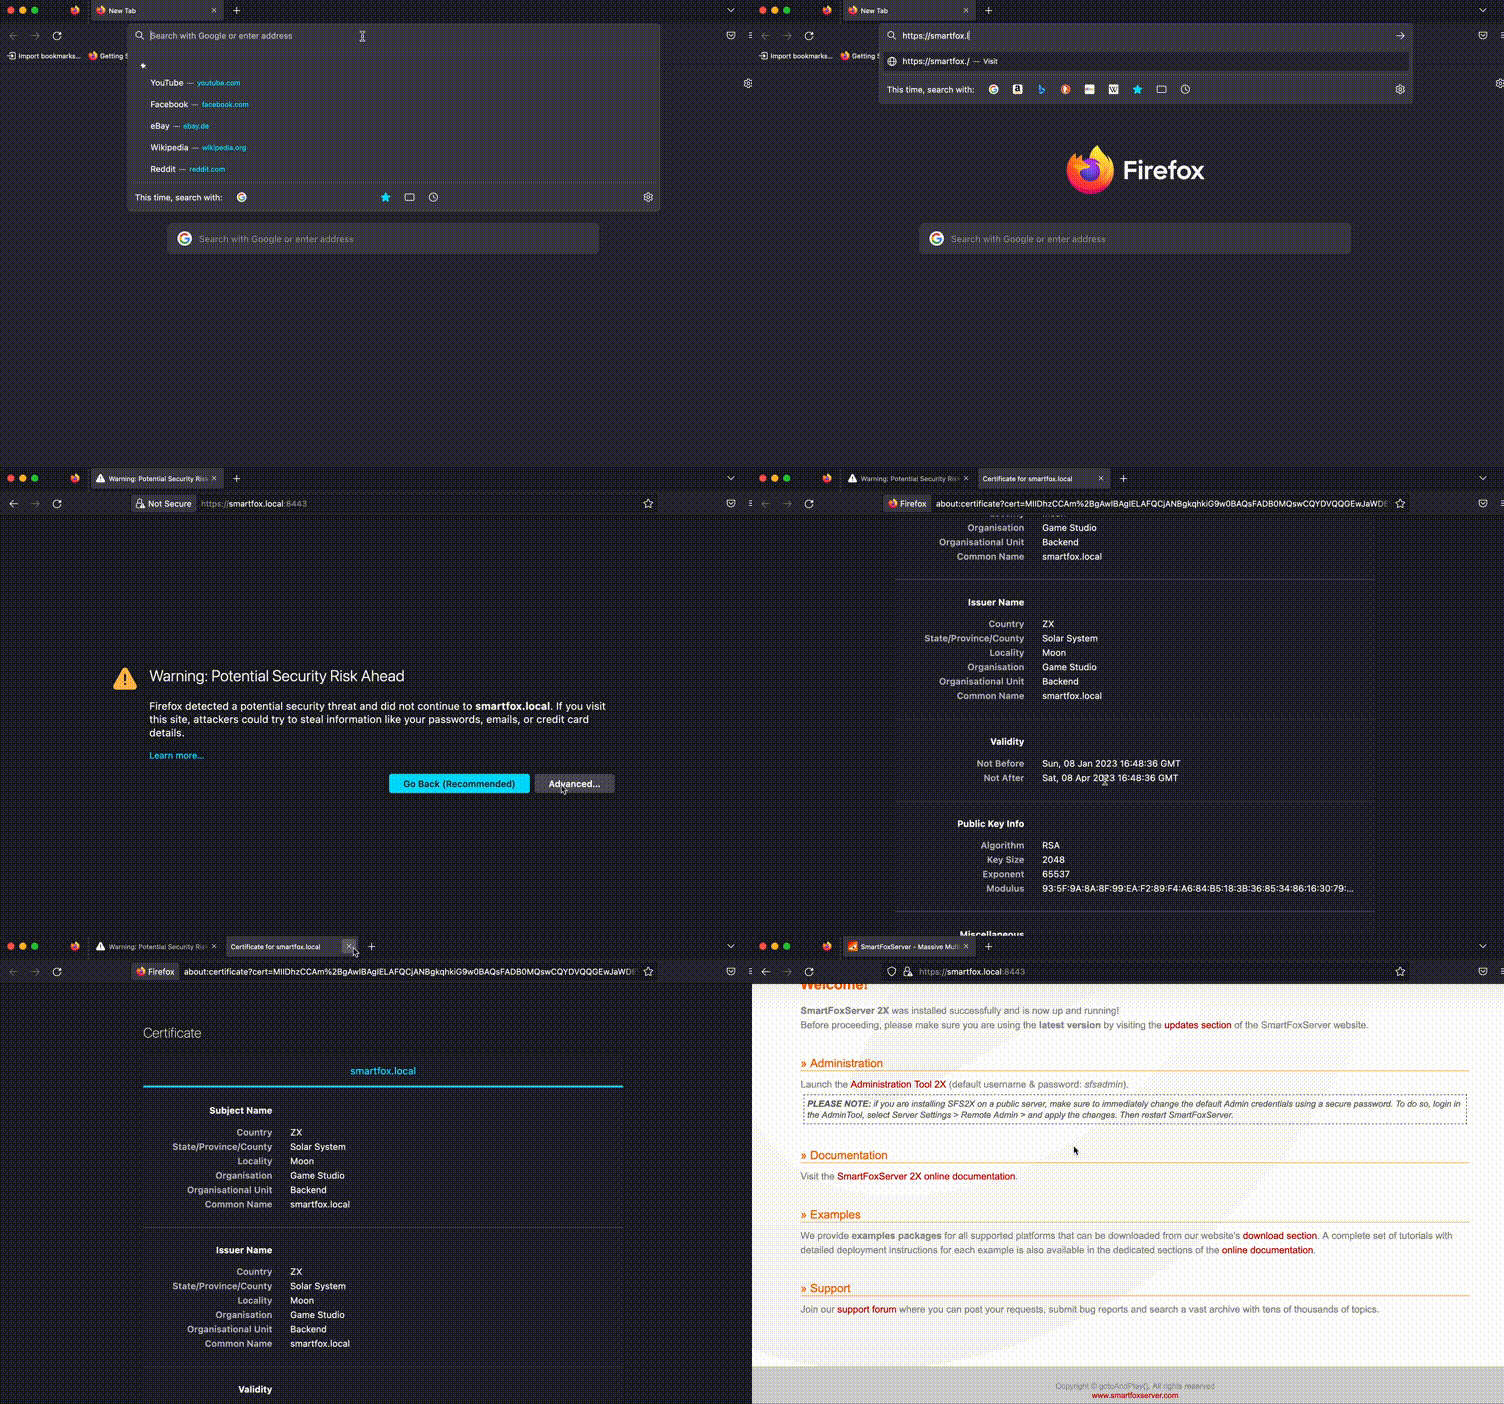
https://smartfox.local:8443 if you edited your hosts file. View the
certificate if it contains data you set up when generating with keytool.

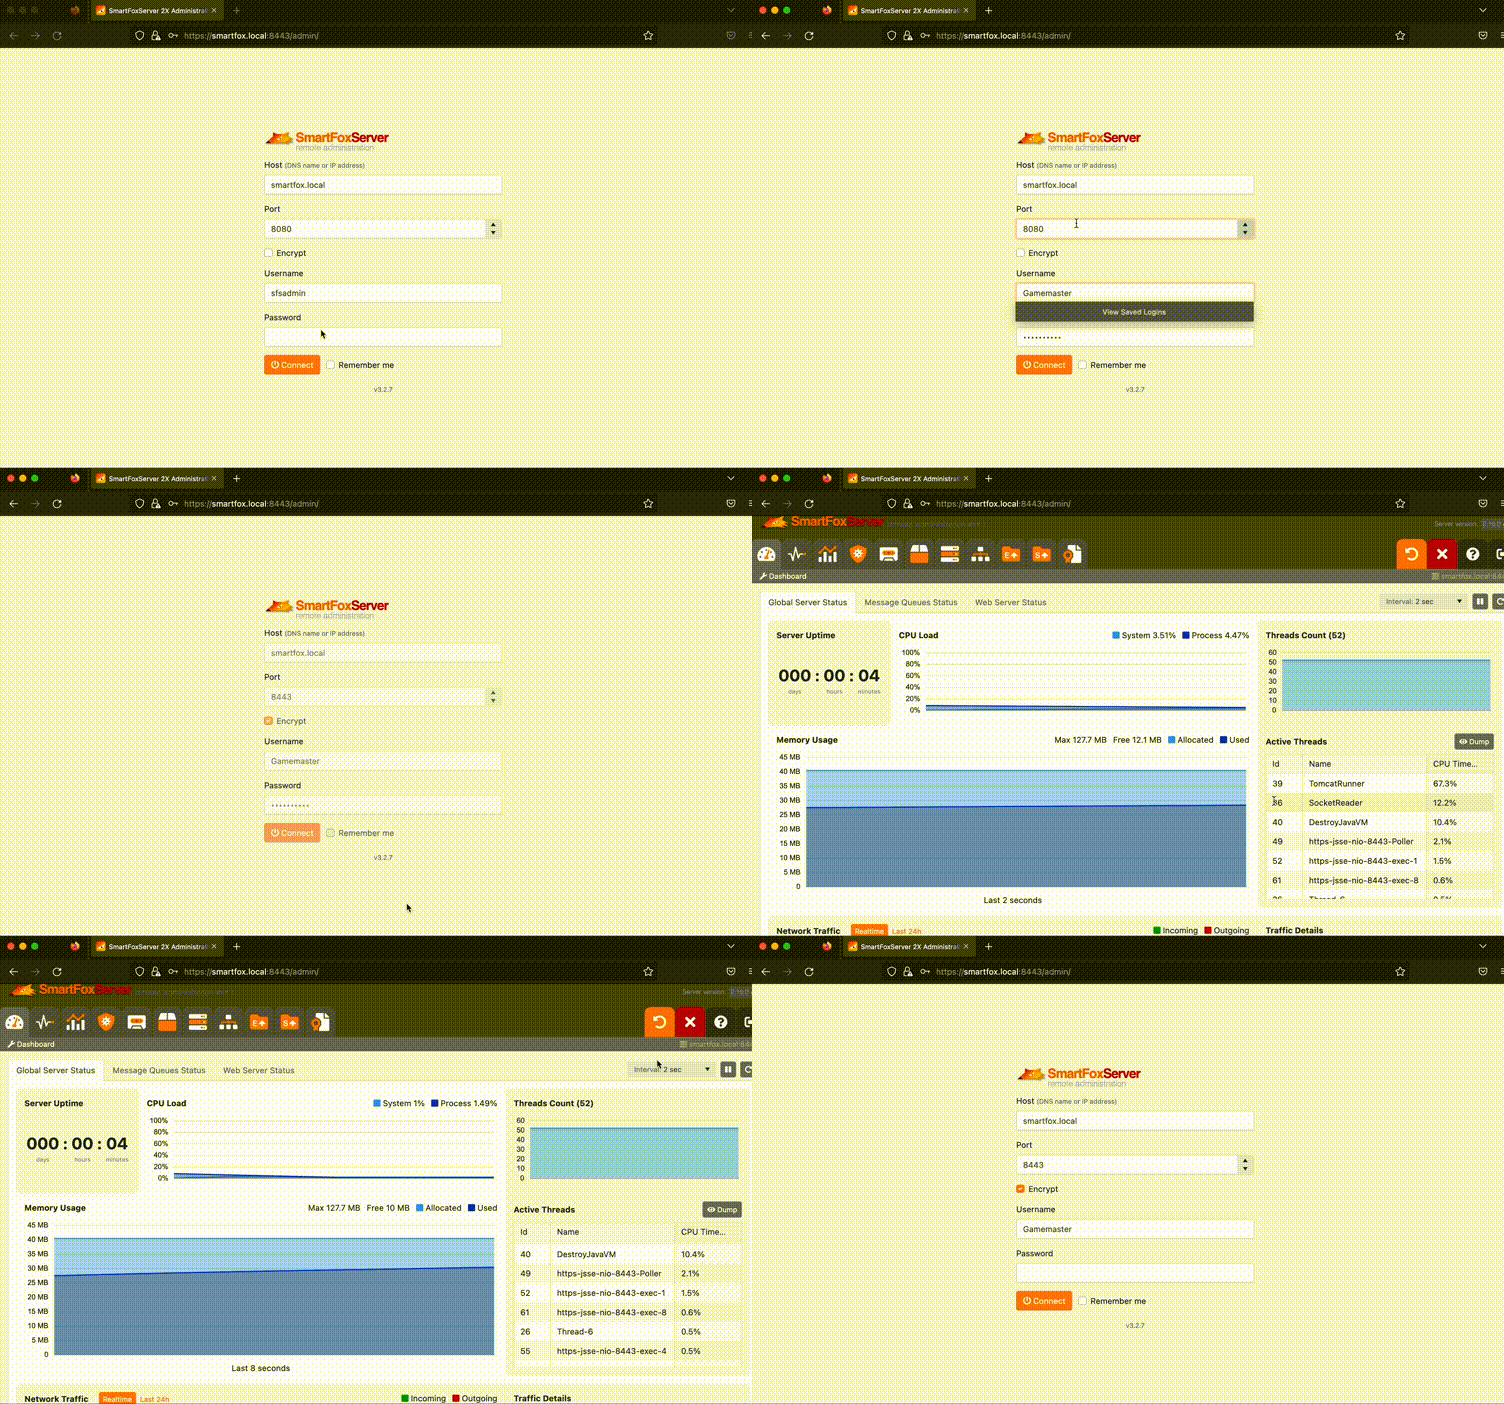
Try logging into the admin panel by specifying the credentials from the variables file.

To learn more about Ansible, I highly recommend Jeff Geerling's book Ansible for DevOps.