Deploy SmartFox Server using Ansible - Part 2
20 January 2023
In the previous post, we created a playbook with which we could deploy SmartFox server on a Debian/Ubuntu machine. It contained basic configuration like admin username, password and SSL certificate parameters. In this part, we are going to extend the playbook and make it more configurable.
If you didn't read the first part, here it is.
Code for this post is on a
new branch part2.
What else can we configure?
There are plenty of things that can be configured in SmartFox. Most of them are
stored as xml files and some of them are inexistent in the default
distribution (for example Zones configuration). In that case, most convenient
would be to manage the configuration by copying files. But there are some places
where we can still add more things to template. There is also the case for
extensions. These are .jar files - they cannot be templated. We can also
customize the environment: location where to install, whether to apply patches
or customize the name of the user to run the process.
More things to configure in smartfox_server.xml.j2
The first thing that we see in the config are naturally the ports that should be
used by the server. Let's change them into variables. In vars/smartfox.yml
create two of them:
---
[...]
smartfox_tcp_port: 9933
smartfox_udp_port: "{{ smartfox_tcp_port }}" # = "9933"
And in the template:
[...]
<socketAddresses>
  <socket address="0.0.0.0" port="{{ smartfox_tcp_port }}" type="TCP"/>
  <socket address="0.0.0.0" port="{{ smartfox_udp_port }}" type="UDP"/>
</socketAddresses>
[...]
In the line with UDP port, I just copy the value of TCP port by evaluating the
variable in a string. Next thing to configure can be the list of allowed IPs to
access the admin panel. We can create a list of IPs in our yml.
smartfox_admin_allowed_ips:
  - 11.22.33.44
  - 22.33.44.55
So under <remoteAdmin> ↘️ <allowedRemoteAddresses> we will specify <string>
nodes that will contain IP strings. To do this, we will use a for loop inside
Jinja statements:
[...]
  <allowedRemoteAddresses>
    {%- for ip in smartfox_admin_allowed_ips %}
      <string>{{ ip }}</string>
    {% endfor %}
  </allowedRemoteAddresses>
[...]
Environment customizations
What if we wanted to install SmartFox in a different directory or run it using
a different user? For the former, let's find all the places where we use the
phrase /opt/smartfox.
$ grep -r "/opt/smartfox"
./tasks/configure-smartfox.yml:    dest: "/opt/smartfox/SmartFoxServer_2X/SFS2X/config/server.xml"
./tasks/configure-smartfox.yml:    dest: "/opt/smartfox/SmartFoxServer_2X/SFS2X/lib/apache-tomcat/conf/server.xml"
./tasks/configure-smartfox.yml:    dest: "/opt/smartfox/SmartFoxServer_2X/SFS2X/lib/apache-tomcat/conf/{{ smartfox_ssl_keystore_file }}"
./tasks/download-smartfox.yml:    dest: "/opt/smartfox"
./tasks/download-smartfox.yml:    creates: "/opt/smartfox/SmartFoxServer_2X/SFS2X/lib/sfs2x-core.jar"
./tasks/prepare-environment.yml:    home: "/opt/smartfox"
./files/smartfox.service:WorkingDirectory=/opt/smartfox/SmartFoxServer_2X/SFS2X
./files/smartfox.service:ExecStart=/opt/smartfox/SmartFoxServer_2X/SFS2X/sfs2x-service start
./files/smartfox.service:ExecStop=/opt/smartfox/SmartFoxServer_2X/SFS2X/sfs2x-service stop
These are all the files where we have to replace /opt/smartfox with a variable
like {{ smartfox_target_directory }}. We can also create another variable that
will conveniently point to /opt/smartfox/SmartFoxServer_2X/SFS2X:
smartfox_target_directory: "/opt/smartfox"
sfs2x_directory: "{{ smartfox_target_directory }}/SmartFoxServer_2X/SFS2X"
So now all the references to /opt/smartfox/SmartFoxServer_2X/SFS2X should be
changed to {{ sfs2x_directory }} and next all the references to
/opt/smartfox (one in download-smartfox.yml and one in prepare.yml) should
be changed with {{ smartfox_target_directory }}.
But the changes do not stop here. We need to move the systemd unit file from
files/smartfox.service to templates/smartfox.service.j2 and change the
method in tasks/install-smartfox.yml from copy to template.
To customize the user for the server, we should also change user creation in
prepare-environment.yml:
- name: Ensure user smartfox exists
  user:
    name: "{{ smartfox_user }}"
    home: "{{ smartfox_target_directory }}"
And change the user in smartfox.service.j2:
[Service]
Type=forking
User={{ smartfox_user }}
And also for all files ownership (use grep -r "owner").
Copying zone configuration, extensions and enabling extension uploads
Most of these things can be configured using the admin panel. However, if we want to keep the configuration in version control and make it easy to rebuild the server in case of failure, we should also make this configuration automated.
SmartFox zones are configurations for a set of rooms and extension that should handle the connection. It makes it possible that a single instance can serve multiple games: for example one zone will be used for chess and the other for checkers. Also game logic must be implemented using extensions.
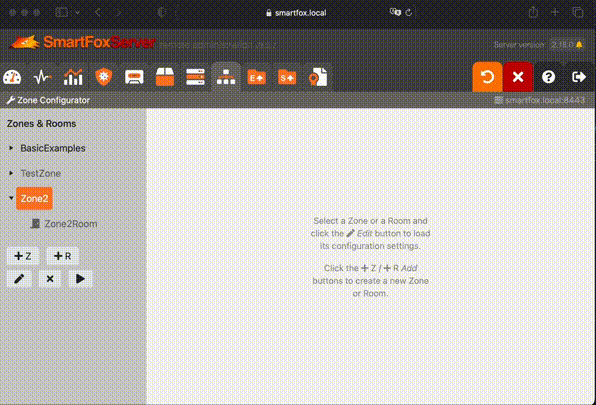
Let's configure some random zone in the admin panel.
After that we should be able to find it in files on the server.
We can fetch them using scp or GUI tools like FileZilla or WinSCP.
Creating an extension would be too long for this post, so browse around examples on SmartFox website. For installing the extensions there is a possibility to upload them via admin panel as well. However, it is locked by default.
Next tasks are simple:
- copy all
files/extensions/*directories toextensions/directory - copy all dependencies for extensions to
extensions/__lib__directory - copy all
files/zones/*.zone.xmlfiles tozones/directory - touch or delete
config/UploadsLock.txtif a toggle is enabled
Let's create a new file tasks/zones-and-extensions.yml. For copying the zone
files with correct extensions we will use with_fileglob feature:
---
- name: Copy all *.jar extensions and dependencies
  copy:
    src: "files/extensions/"
    dest: "{{ sfs2x_directory }}/extensions/"
    owner: "{{ smartfox_user }}"
    group: "{{ smartfox_user }}"
    mode: 0644
  notify: restart smartfox

- name: Remove default zone
  file:
    path: "{{ sfs2x_directory }}/zones/BasicExamples.zone.xml"
    state: absent
  notify: restart smartfox

- name: Copy all *.zone.xml files
  copy:
    src: "{{ item }}"
    dest: "{{ sfs2x_directory }}/zones/"
    owner: "{{ smartfox_user }}"
    group: "{{ smartfox_user }}"
    mode: 0644
  with_fileglob: "files/zones/*.zone.xml"
  notify: restart smartfox

- name: Toggle lock for uploading extensions via admin panel
  file:
    path: "{{ sfs2x_directory }}/config/UploadsLock.txt"
    state: "{{ 'touch' if smartfox_lock_uploads else 'absent' }}"
    modification_time: preserve
    access_time: preserve
    owner: "{{ smartfox_user }}"
    group: "{{ smartfox_user }}"
    mode: 0644
  notify: restart smartfox
In each task we also used notify: restart smartfox. This is a call to a
handler in case the state of the files changed. This handler is supposed to
restart SmartFox service so all the new and deleted extensions, zones and upload
lock can be reloaded. The task where we toggle the lock file needs to preserve
modification and access times, so that in case it existed, the change did not
happen so we don't have to restart the service. Let's create a new directory in
our playbook with a new file that will be used for handlers:
handlers/smartfox.yml. Handler tasks have the same structure as any other
task.
---
- name: restart smartfox
  service:
    name: smartfox
    state: restarted
Now we need to include all the new tasks and handlers in the main playbook file.
Also add notify: restart smartfox into every task in configure-smartfox.yml.
---
- hosts: all
  become: yes

  vars_files:
    - vars/smartfox.yml

  handlers:
    - import_tasks: handlers/smartfox.yml

  tasks:
    - import_tasks: tasks/prepare-environment.yml
    - import_tasks: tasks/download-smartfox.yml
    - import_tasks: tasks/configure-smartfox.yml
    - import_tasks: tasks/install-smartfox.yml
    - import_tasks: tasks/zones-and-extensions.yml
Testing and experimenting
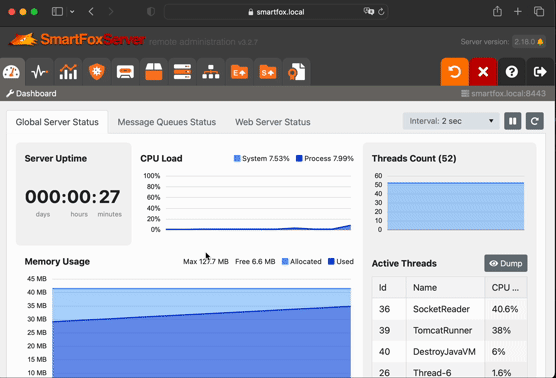
To test our setup we can log in again to the administration tool. From there we
can generate a new zone and check for loaded extensions. I used Tris game as an
example from here. What is
needed is a zone with a room (that will be used as a lobby). Place the extension
in files/extensions/Tris/TrisExtension.jar and generate a zone using its
TrisExtension class. Configure the client (scripts/main.js)to match your
configuration (lobby room name, uncomment class name for Java extension,
config.useSSL=true, connection parameters, etc.)
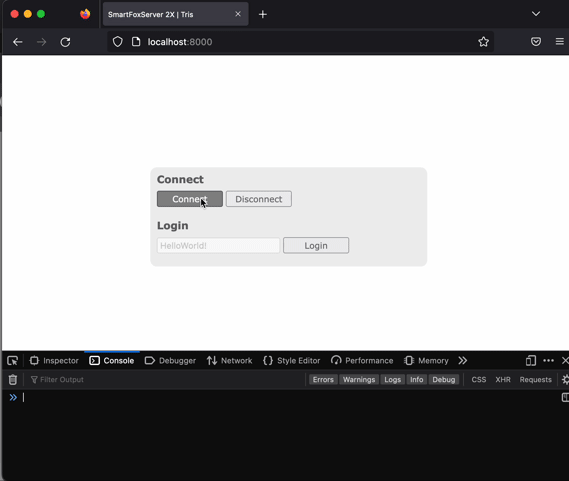
You can also test the IP restriction to log in - change allowed IPs to some random one, apply the playbook and see if you can still log in to the admin page. Lock and unlock uploading of extensions and servlets.