Deploy SmartFox Server using Ansible - Part 4
21 February 2023
In this post we will go through the process of converting the playbook from the previous posts into a reusable role. At the last step, we will go through the process of publishing the role in Ansible Galaxy.
The finished process is available here.
Initializing a role
For the new role we will use a new directory and a new repository. In terminal
type the following commands outside of your current repository with playbook
(for example in ~/projects):
$ ansible-galaxy role init --init-path . ppabis.smartfox
$ cd ppabis.smartfox
$ git init
We will get a structure of files and directories needed for a role.
Converting vars to defaults
The first thing that we need to do is to convert and split the variables from
vars/ into defaults and vars. The defaults are the user of the role
can change whereas vars act as "constants" (although they can be overridden).
In our case the separation is simple: vars/smartfox.yml will go to defaults
while other files will stay in vars.
We should include descriptions of each default in the README.md.
Converting the playbook to main.yml
main.yml is the entry point of a role. Thus it is the place that is binding
all the other tasks, just like a playbook. However, the syntax is different. We
will convert the playbook.yml into tasks/main.yml. First, copy the contents
of the playbook. Then remove - hosts: all and become: yes from the top.
Remove the indentation of all the things so that all the hyphens are at the most
left position. We should get something like this:
---
vars_files:
- vars/smartfox.yml
- "vars/java-{{ ansible_os_family }}.yml"
- "vars/packages-{{ ansible_os_family }}.yml"
- "vars/packages-common.yml"

handlers:
- import_tasks: handlers/smartfox.yml

tasks:
- import_tasks: tasks/prepare-environment.yml
- import_tasks: tasks/version-detect.yml
- import_tasks: tasks/download-smartfox.yml
- import_tasks: tasks/replace-java.yml
  when: ansible_architecture == "aarch64"
- import_tasks: tasks/configure-smartfox.yml
- import_tasks: tasks/install-smartfox.yml
- import_tasks: tasks/zones-and-extensions.yml
Now for each vars_files item, convert it into include_vars task. For example
the first item will become:
- include_vars: "vars/java-{{ ansible_os_family }}.yml". Also remove the
vars_files line. vars/smartfox.yml should be removed because now it is
migrated to defaults and loaded automatically by Ansible. The handlers can
be deleted as well as they will be also loaded automatically - just copy
handlers/smartfox.yml. The tasks line must also be deleted.
Other resources
Copy contents of templates to the new role. For files copy a default keystore
that is pointed in defaults. Also include the empty directories like zones
and extensions (place .gitkeep in them to be able to add them to Git).
Testing the role
I decided to test the role using Molecule. It's a tool for testing Ansible roles
and playbooks. It has to be installed separately via pip. It can be also
extended with plugins. For example, I will use the molecule-ec2 plugin to
spin up instances on AWS and test the role there. However, writing a good test
is time consuming, so we will also do some manual checks. Also using ec2
driver often requires manual intervention and retries. I won't describe too much
about Molecule here as it's a complex tool with a lot of possibilities. Find it
here.
To have a working Molecule system we can do it in two ways: if we don't have a
role yet, we can use molecule init role to create a new role like with
ansible-galaxy but with a molecule/ directory included, or if we already
have a role, molecule init scenario. With scenarios we can define more tests
to verify that our role is working correctly (for example by changing
variables). The line below will create a new scenario named second-test with
driver ec2.
$ molecule init scenario -d ec2 second-test
I configured my molecule.yml with 4 different machines to run on AWS and to
cover all necessary configurations: RedHat and Debian systems + x86 and ARM.
platforms:
  - name: rocky8-arm
    image: ami-0113ad83a378af551
    instance_type: t4g.micro
    vpc_subnet_id: subnet-01234567890abcdef
    region: eu-central-1
  - name: alma8-x86
    image: ami-0b3d1809cc222924a
    instance_type: t2.micro
    [...]
To find public IPs of the instances, molecule list is not enough - go to
~/.cache/molecule/role_name/default/instance_config.yml and view the file to
find public IP. For EC2 driver, molecule create requires sometimes to be
repeated twice - it depends on AWS speed.
Idempotence
After creation we can run molecule converge to run the role on the instance.
This will let us fix the most basic bugs about our role (for example missing
files or typos). The next test is idempotence. It means that running the role
twice with exactly the same configuration shouldn't report any changes -
everything should be either ok or skipped. molecule idempotence will run
this basic test.
$ molecule idempotence

PLAY RECAP *********************************************************************
alma8-x86                  : ok=18   changed=0    unreachable=0    failed=0    skipped=8    rescued=0    ignored=0
debian11-arm               : ok=21   changed=0    unreachable=0    failed=0    skipped=5    rescued=0    ignored=0
rocky8-arm                 : ok=20   changed=0    unreachable=0    failed=0    skipped=6    rescued=0    ignored=0
ubuntu2004-x86             : ok=19   changed=0    unreachable=0    failed=0    skipped=7    rescued=0    ignored=0

INFO     Idempotence completed successfully.
Verify SmartFox admin credentials and IPs
Next thing is to verify if we can use our credentials defined in defaults to
login to the SmartFox admin panel. We can do it by going to the site and
trying. In case you are also using EC2, we need to also add a security group
rule to let port 8443 in. This is defined in create.yml in variable
default_security_group_rules. Run destroy and create again to ensure that
everything will be set up as expected. As mentioned earlier, IP addresses of the
instances can be found in the .cache directory.
By default it will show that the remote IP is not allowed. Thus we should change
the variable smartfox_admin_allowed_ips in converge.yml and in a new
scenario - that way we can test if allowing and blocking IPs works. Find your
public IP using some online tool like https://api.ipify.org/ and add it to the
variable. The converge file will look then something like this
---
- name: Converge
  hosts: all
  become: true

  vars:
    - smartfox_admin_allowed_ips:
      - "158.18.123.56"

  tasks:
    - name: "Include ppabis.smartfox"
      include_role:
        name: "ppabis.smartfox"
This is also a good place to see if there's only two changes (server.xml and
restart smartfox) if we are doing it on the already converged role.
$ molecule converge

PLAY RECAP *********************************************************************
alma8-x86                  : ok=19   changed=2    unreachable=0    failed=0    skipped=8    rescued=0    ignored=0
debian11-arm               : ok=22   changed=2    unreachable=0    failed=0    skipped=5    rescued=0    ignored=0
rocky8-arm                 : ok=21   changed=2    unreachable=0    failed=0    skipped=6    rescued=0    ignored=0
ubuntu2004-x86             : ok=20   changed=2    unreachable=0    failed=0    skipped=7    rescued=0    ignored=0
Check if web server is even started
However, if something fails somewhere in our role, we can at least check if the
webserver even started and is serving 200 responses. We can do it in check.yml
file using uri module of Ansible.
---
- name: Verify
  hosts: all
  gather_facts: false

  tasks:
  - name: Get webserver response
    uri:
      url: https://localhost:8443/admin
      validate_certs: false
    register: result

  - name: Assert that status code is 200
    assert:
      that:
        - result.status == 200
There's a lot that can be done to test the role. We will not cover every possible scenario here, but during development, it's worth making tests for the future Ansible role. To speed up the process, we can use Docker or Vagrant drivers as they will be faster to create and destroy. We can also use semi-ready made AMI images in EC2 using snapshots or tools like Packer that will already have many steps satisfied. But the scenario of converging the role to a clean OS is a good practice before pushing out an update.
Meta file
The file we will edit is meta/main.yml. This file contains metadata about the
role such as author, license, dependencies, supported platforms and so on. The
first fields are quite self-explanatory. For the list of platforms we will
follow the link in the comment.
The search for the platform can be tricky. For example Ubuntu distros are only
listed as codenames. Alma and Rocky are not listed, instead we find EL. For
starters, I will add the following platforms:
platforms:
  - name: Debian
    versions:
      - bullseye
  - name: EL
    versions:
      - 8
  - name: Ubuntu
    versions:
      - focal
For now we don't use any dependencies but this might change in the future (for example we might want to use common Java installation role or open firewall ports).
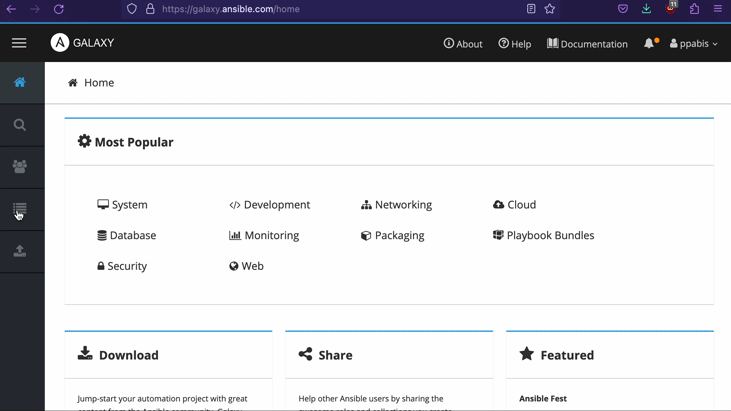
Publishing a role on Ansible Galaxy is simple. Just head to
https://galaxy.ansible.com/ and authenticate with GitHub. Then click on the
My Content button and then New Role. Allow access to your public
repositories on GitHub and select repository to use as a role.
To synchronize changes in the repository with the Galaxy, go to My Content and
click on the Import button next to the role.
Hope that series of these articles will help you to create your own Ansible role that you will be able to share with the community.