Monitor recency of your systems with CloudWatch
13 March 2023
In the previous post we created a Datadog check and monitor to keep track of how many packages can be upgraded on our systems, when was the last time we rebooted the system and what is the major release of the operating system. Today, we will replicate the same metrics but using AWS CloudWatch service. Let's start by creating test instances.
Repository for this post is available here: CloudWatch-System-State.
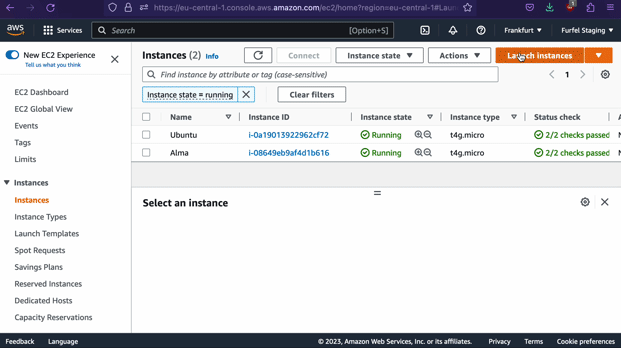
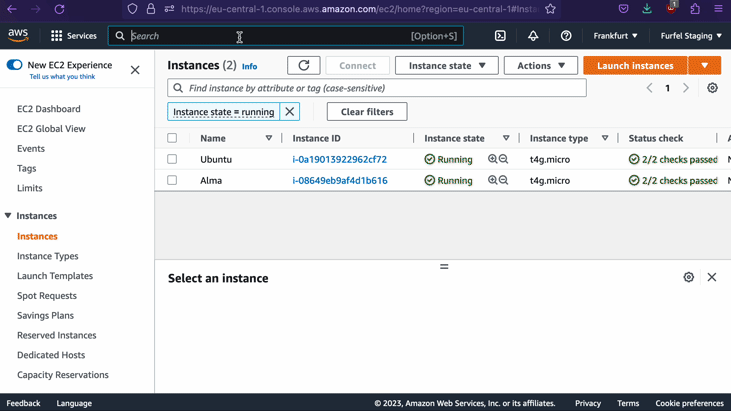
Test instances
To create test instances we will use Terraform. You can also create the instances manually in the Console - just spin up a Ubuntu and some RedHat based instance with public IP and default settings. Code in this post is not complete as it will take up too much space. You can find the complete code for specific components here:
Copy the above files and adapt them for yourself - which public key to upload to
AWS instance in keys.tf, what IPs to allow SSH access from in newly created
terraform.tfvars as ssh-subnet = "99.88.22.0/24". If you are creating
instances manually, keep "Allow SSH" checkbox checked when launching the new
instance - except a bit larger disk and OS, everything should be default.
The Terraform boilerplate code should look like this:
$ ls -l
-rw-r--r--  1 ppabis  staff    389 Mar  4 18:02 amis.tf
-rw-r--r--  1 ppabis  staff    106 Mar  4 18:02 keys.tf
-rw-r--r--  1 ppabis  staff    136 Mar  4 18:02 main.tf
-rw-r--r--  1 ppabis  staff    283 Mar  4 18:02 sg.tf
-rw-r--r--  1 ppabis  staff     29 Mar  4 17:58 terraform.tfvars
-rw-r--r--  1 ppabis  staff    125 Mar  4 18:02 variables.tf
Let's create a new file instances.tf which will define two instances, one
Ubuntu and one AlmaLinux. We will also output their public IPs.
resource "aws_instance" "ubuntu" {
  ami           = data.aws_ami.ubuntu-arm.id
  instance_type = "t4g.micro"
  key_name      = aws_key_pair.ssh.key_name
  tags = { Name = "Ubuntu" }
  vpc_security_group_ids = [ aws_security_group.ssh.id ]
}


resource "aws_instance" "alma" {
  ami           = data.aws_ami.alma-arm.id
  instance_type = "t4g.micro"
  key_name      = aws_key_pair.ssh.key_name
  tags = { Name = "Alma" }
  vpc_security_group_ids = [ aws_security_group.ssh.id ]
}

output "ubuntu" { value = aws_instance.ubuntu.public_ip }
output "alma" { value = aws_instance.alma.public_ip }
Set up your credentials to AWS, run terraform init, terraform apply.
Prepare for CloudWatch
Let's SSH to one of the instances and install AWS CLI following the official
guide (use awscli-exe-linux-x86_64.zip if you have t2, t3 or t3a
instance).
$ ssh ubuntu@3.4.5.6 # replace with your instance's IP and -i to select private key
ubuntu@ip-10-0-0-1:~$ curl "https://awscli.amazonaws.com/awscli-exe-linux-aarch64.zip" -o "awscliv2.zip"
# the above link depends on your architecture, it can be also awscli-exe-linux-x86_64.zip
ubuntu@ip-10-0-0-1:~$ unzip awscliv2.zip
ubuntu@ip-10-0-0-1:~$ sudo ./aws/install
Try running aws command to see if you see help message.
ubuntu@ip-10-0-0-1:~$ aws
usage: aws [options] <command> <subcommand> [<subcommand> ...] [parameters]
To see help text, you can run:
  aws help
  aws <command> help
  aws <command> <subcommand> help
Great, it seems that our CLI tools are working. Let's try issuing a metric to CloudWatch.
ubuntu@ip-10-0-0-1:~$ aws cloudwatch put-metric-data --metric-name "Test" --namespace "Test" --value 1
Unable to locate credentials. You can configure credentials by running "aws configure".
It seems that we have no credentials associated with our instance. Normally we
use access keys to authenticate with AWS. However, for EC2 instances, it's worth
to set roles instead - they don't require any credentials to be stored on the
instance. Let's create a role for our instance in a new file role.tf.
resource "aws_iam_role" "ec2-cloudwatch" {
    name = "ec2-cloudwatch"
    assume_role_policy = <<EOF
    {
      "Version": "2012-10-17",
      "Statement": [ {
        "Action": "sts:AssumeRole",
        "Principal": { "Service": "ec2.amazonaws.com" },
        "Effect": "Allow",
        "Sid": ""
      } ]
    }
    EOF
}

resource "aws_iam_instance_profile" "ec2-cloudwatch" {
    name = "ec2-cloudwatch"
    role = aws_iam_role.ec2-cloudwatch.name
}
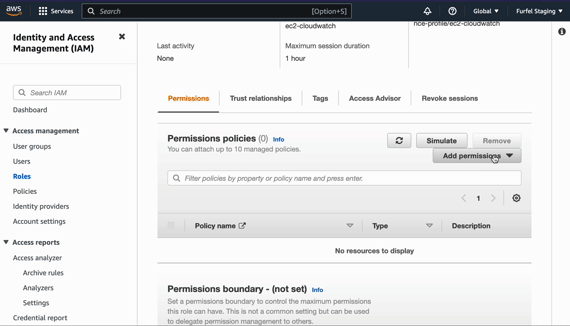
If you are using AWS console, go to IAM, create a new role, then create a new policy and finally attach role to policy.
Here we create a role and instance profile that will let us attach the role to
an instance (roles have also other uses than just EC2 instances). Let's attach
our new role to our two instances. We can specify it directly in the instance's
resource block as iam_instance_profile but then disassociation is not possible
as of Terraform 1.3.9 and AWS provider 4.57.0 - you can only change it to
another instance profile. Let's modify our instances and add the profile.
...
  key_name      = aws_key_pair.ssh.key_name
  iam_instance_profile = aws_iam_instance_profile.ec2-cloudwatch.name
  tags = { Name = "Ubuntu" }
...
  key_name      = aws_key_pair.ssh.key_name
  iam_instance_profile = aws_iam_instance_profile.ec2-cloudwatch.name
  tags = { Name = "Alma" }
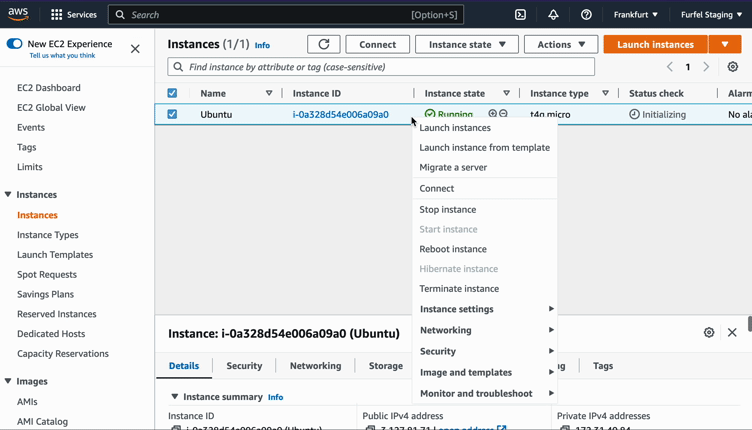
If you are using AWS console, go to EC2, right click on your instance, move down to "Security" and "Modify IAM role".
After applying, SSH to one of the instances and try issuing a metric again.
ubuntu@ip-10-0-0-1:~$ aws cloudwatch put-metric-data --metric-name "Test" --namespace "Test" --value 1
An error occurred (AccessDenied) when calling the PutMetricData operation: User: arn:aws:sts::0123456789:assumed-role/ec2-cloudwatch/i-0abcde123456 is not authorized to perform: cloudwatch:PutMetricData because no identity-based policy allows the cloudwatch:PutMetricData action
That result looks more promising. We will create a new policy and attach it to
the role. Add these two blocks in role.tf and apply.
resource "aws_iam_policy" "cloudwatch" {
    name = "CloudWatch-PutMetric"
    policy = <<EOF
    {
      "Version": "2012-10-17",
      "Statement": [ {
        "Sid": "Stmt1",
        "Effect": "Allow",
        "Action": [ "cloudwatch:PutMetricData" ],
        "Resource": "*"
      } ]
    }
    EOF
}

resource "aws_iam_role_policy_attachment" "cloudwatch" {
    role = aws_iam_role.ec2-cloudwatch.name
    policy_arn = aws_iam_policy.cloudwatch.arn
}
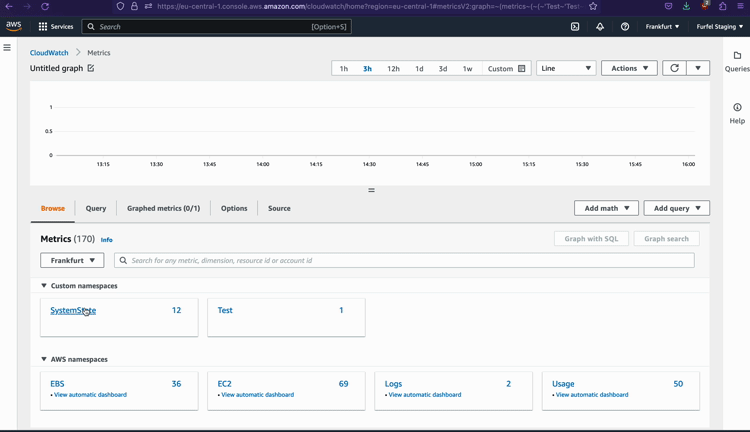
After 5 or 10 seconds, things should propagate. Now when you SSH to one of the instances and issue a value for the metric, there should be no error. Let's look on the metrics in our console to ensure that they are there.
Reporting metrics from the instance
Now it's time to create a script that will periodically report metrics to
CloudWatch with the values we want. Just as with Datadog case, we will use
Python. Create a new file metrics.py in some common place such as /opt. Copy
functions from previous script available here.
We will need get_upgradable_packages, get_days_since_last_reboot and
get_os_major_version functions. First remove indentation - these functions
will be global, outside of any class. Remove self from each of the functions.
Replace each get_subprocess_output with subprocess.Popen:
    # Old method: out, _, _ = get_subprocess_output( [ "lsb_release", "-rs" ], self.log )
    proc = subprocess.Popen( [ "lsb_release", "-rs" ], stdout=subprocess.PIPE, stderr=subprocess.PIPE ) # New method
    out, _ = proc.communicate() # New method
    out = out.decode( "utf-8" ) # New method
Add the following imports at the top of the file and after the transformations, the file should look something like this:
import os, shutil, socket, subprocess, boto3
from datetime import datetime

def get_upgradable_packages():
    ...

def get_days_since_last_reboot():
    ...

def get_os_major_version():
    ...
Let's test what the file produces. So at the bottom add this test code that will print values for every metric we need:
if __name__ == "__main__":
    print( f"Upgradable packages: { get_upgradable_packages() }" )
    print( f"Days since last reboot: { get_days_since_last_reboot() }" )
    print( f"OS major version: { get_os_major_version() }" )
Now run the script on the remote machine.
ubuntu@ip-10-0-0-1:~$ sudo apt update
ubuntu@ip-10-0-0-1:~$ python3 metrics.py
Upgradable packages: 2
Days since last reboot: 0
OS major version: 20
Connecting the script to CloudWatch and scheduling it
So the next step is to install boto3 package which is the Python equivalent of
AWS CLI/API (why "boto" see here. Type
sudo pip3 install boto3 into terminal. You might need to install pip using
apt install python3-pip or dnf install python38-pip. Then add it to the
imports in the script. Now we need to create a function that will send data to
CloudWatch.
# Helper method to quickly make a MetricData object
def create_metric(name, value, unit, dimensions):
    return {
        "MetricName": name,
        "Dimensions": dimensions,
        "Unit": unit,
        "Value": value
    }

if __name__ == "__main__":
    dimensions = [
        { "Name": "Hostname", "Value": socket.gethostname() },
        { "Name": "Distribution", "Value": os.environ["OS_DISTRIBUTION"] if "OS_DISTRIBUTION" in os.environ else "Unknown" }
    ]

    packages = create_metric( "UpgradablePackages", get_upgradable_packages(), "Count", dimensions)
    days_since_last_reboot = create_metric( "DaysSinceLastReboot", get_days_since_last_reboot(), "Count", dimensions)
    os_major_version = create_metric( "OSMajorVersion", get_os_major_version(), "None", dimensions)

    cw = boto3.client( "cloudwatch", region_name="eu-central-1" )
    cw.put_metric_data(
        Namespace = "SystemState",
        MetricData = [
            packages,
            days_since_last_reboot,
            os_major_version
        ]
    )
Now we need to schedule the script to run periodically. We will use cron for
that. Type sudo crontab -e and add the following line to report the metric
every hour. For RedHat systems of RHEL 8, install python38 packages and use
/usr/bin/python3.8 instead.
* */1 * * * OS_DISTRIBUTION=Ubuntu /usr/bin/python3 /opt/metrics.py
If you see GNU nano or pico editor, exit with Ctrl+X, but if vi is the default
editor, press i to insert text, then ESC, and :wq, Return to save and exit.
After some hours we should see the metrics in CloudWatch. We can also change
cron expression to */10 * * * * to report every 10 minutes and see the metrics
quicker.
As you can see, reporting metrics to CloudWatch is not much more complicated than doing it with Datadog.
In the ideal, it should be as easy as writing one line of code to create a new metric. - The DevOps Handbook Kim, Humble, et al.