Scan OS of your EC2 instances with Trivy
01 May 2023
Today we will create a simple routine for scanning our instances using Trivy. It is a quite lightweight tool for discovering vulnerabilities, stored secrets and other security concerns in the given targets. It can scan files in the filesystem, Docker images, and even AWS infrastructure. In this post we will create daily vulnerability reports that will be uploaded to S3 bucket and to our e-mail via SNS. Moreover, we will output metrics to CloudWatch with the number of vulnerabilities by its severity, like critical, high, etc.
Terraform code for an example instance and its configuration is available here. Especially look at the IAM permissions that are required for this recipe.
Installing Trivy
Installing Trivy is trivial. As it's made in Go, we just need a single binary.
We can get it from
GitHub releases. There are
plenty of targets and also DEB and RPM packages available. But in this example,
I will just use .tar.gz archive and extract the binary to /usr/local/bin/.
$ # As I am using t4g.nano instance, I need to use ARM64 binary
$ # You can also perform signature check here to ensure package integrity.
$ wget https://github.com/aquasecurity/trivy/releases/download/v0.40.0/trivy_0.40.0_Linux-ARM64.tar.gz
$ mkdir -p /tmp/trivy && tar -C /tmp/trivy/ -xvf trivy_0.40.0_Linux-ARM64.tar.gz
$ sudo mv /tmp/trivy/trivy /usr/local/bin/trivy
$ sudo chmod +x /usr/local/bin/trivy
The process is also codified as an Ansible playbook in the repository.
Performing first scan
Let's perform a rootfs scan first against the root of the system. With that we
will know what flags and arguments to use. For example, Trivy, as of version
0.40.0, has a hard time with corrupted .jar files - it just fails on the
ones that it cannot extract. So set some default values and see if it succeeds.
It will take around 5 minutes to complete the scan.
$ trivy rootfs / --scanners vuln
2023-04-27T09:43:45.083Z        INFO    Vulnerability scanning is enabled
2023-04-27T09:43:57.263Z        INFO    JAR files found
2023-04-27T09:43:57.281Z        INFO    Analyzing JAR files takes a while...
2023-04-27T09:43:57.507Z        INFO    Detected OS: ubuntu
...
ip-172-31-1-1 (ubuntu 20.04)
===============================
Total: 617 (UNKNOWN: 0, LOW: 258, MEDIUM: 350, HIGH: 9, CRITICAL: 0)
...
So, if we got an output, we can proceed with the next step. Otherwise, try with
--skip-files and --skip-dirs flags to skip some files and directories that
are causing problems.
Check this documentation page
for more info.
Creating a script with processing
To send the results of Trivy scan to S3 and CloudWatch, we need a script. It's
possible to use AWS CLI or SDK. To simplify things, let's use Python and Boto3.
It will be executed after the scan is complete. In Trivy let's use
--format json to make it easy to parse the output.
import boto3, json, sys
from datetime import datetime as dt

# Helper function for uploading to S3 with current date prefixed in the key
def upload_to_s3(key, data):
  s3 = boto3.resource('s3')
  key = dt.now().strftime("%Y-%m-%d/") + key
  # TODO: Change this bucket name to yours
  s3.Object('trivy-results-bucket', key).put(Body=data)


# Sums up the number of vulnerabilities by severity from all types of packages
# Returns: `{"CRITICAL": 123, "HIGH": 456, ...}`
def sum_results(json_data):

  severities = {}

  if 'Results' in json_data:
    for result in json_data['Results']: # For each package class (deb, pyhton, etc.)

      if 'Vulnerabilities' in result:
        for vuln in result['Vulnerabilities']: # For each vulnerability found in this class

          # Increase or create the counter
          if vuln['Severity'] in severities:
            severities[vuln['Severity']] += 1
          else:
            severities[vuln['Severity']] = 1

  return severities

# Takes the input of `sum_results` and for each key (severity) it puts the
# metric into CloudWatch. Also uses `ArtifactName` from JSON as a dimension to
# distinguish between different instances.
def put_to_cloudwatch(results, artifact_name):
  cloudwatch = boto3.client('cloudwatch')

  for k in results: # For each severity
    cloudwatch.put_metric_data(
      Namespace='TrivyScan', # TODO: Change namespace to yours
      MetricData=[ {
          'MetricName': f"{k}_Vulnerabilities",
          'Unit': "Count",
          'Dimensions': [ {'Name': 'ArtifactName', 'Value': artifact_name} ],
          'Value': results[k]
        } ]
    )

# The main function requires a parameter with the path of Trivy's JSON output
if __name__ == '__main__':
  with open(sys.argv[1], "rb") as f:
    data = f.read()
    json_data = json.loads(data.decode('utf-8'))
    artifact_name = json_data['ArtifactName']
    upload_to_s3( f"{artifact_name}.json", data )
    put_to_cloudwatch( sum_results(json_data), artifact_name )
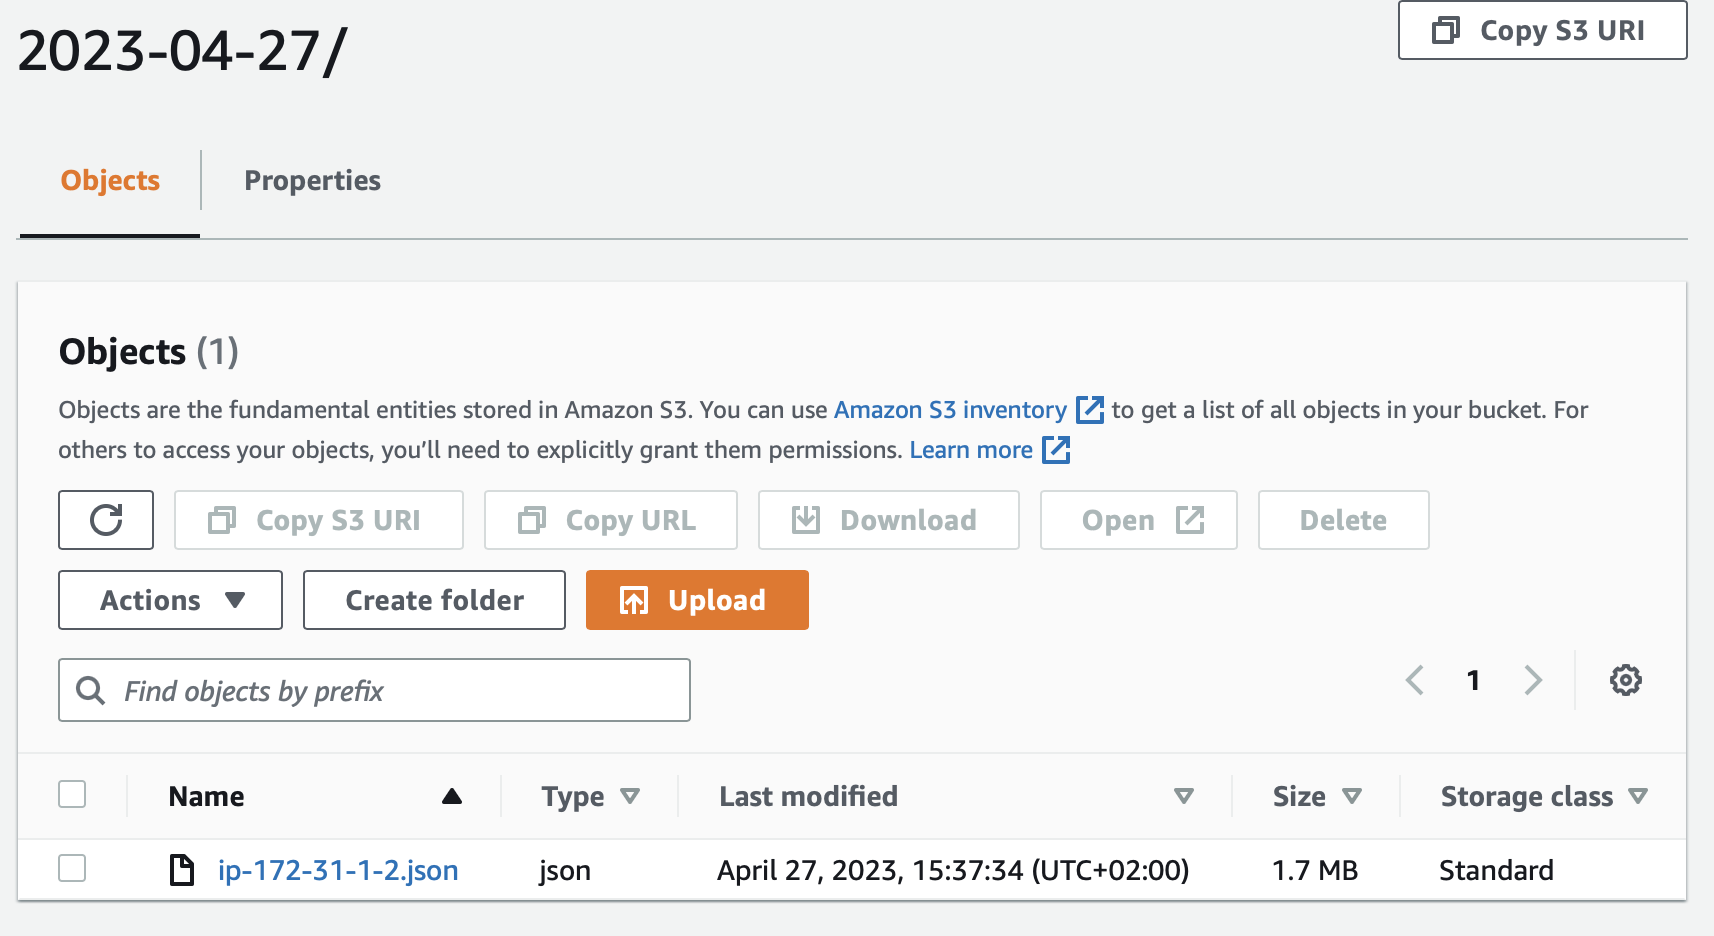
Again, let's scan our rootfs, save the results to JSON and process the results
with the saved script. Then we can look into our S3 bucket and CloudWatch to see
if everything worked as expected.
$ trivy rootfs / --scanners vuln --format json --output rootfs.json
$ export AWS_DEFAULT_REGION=eu-central-1 # Change to yours
$ python3 /usr/local/lib/process-results.py rootfs.json
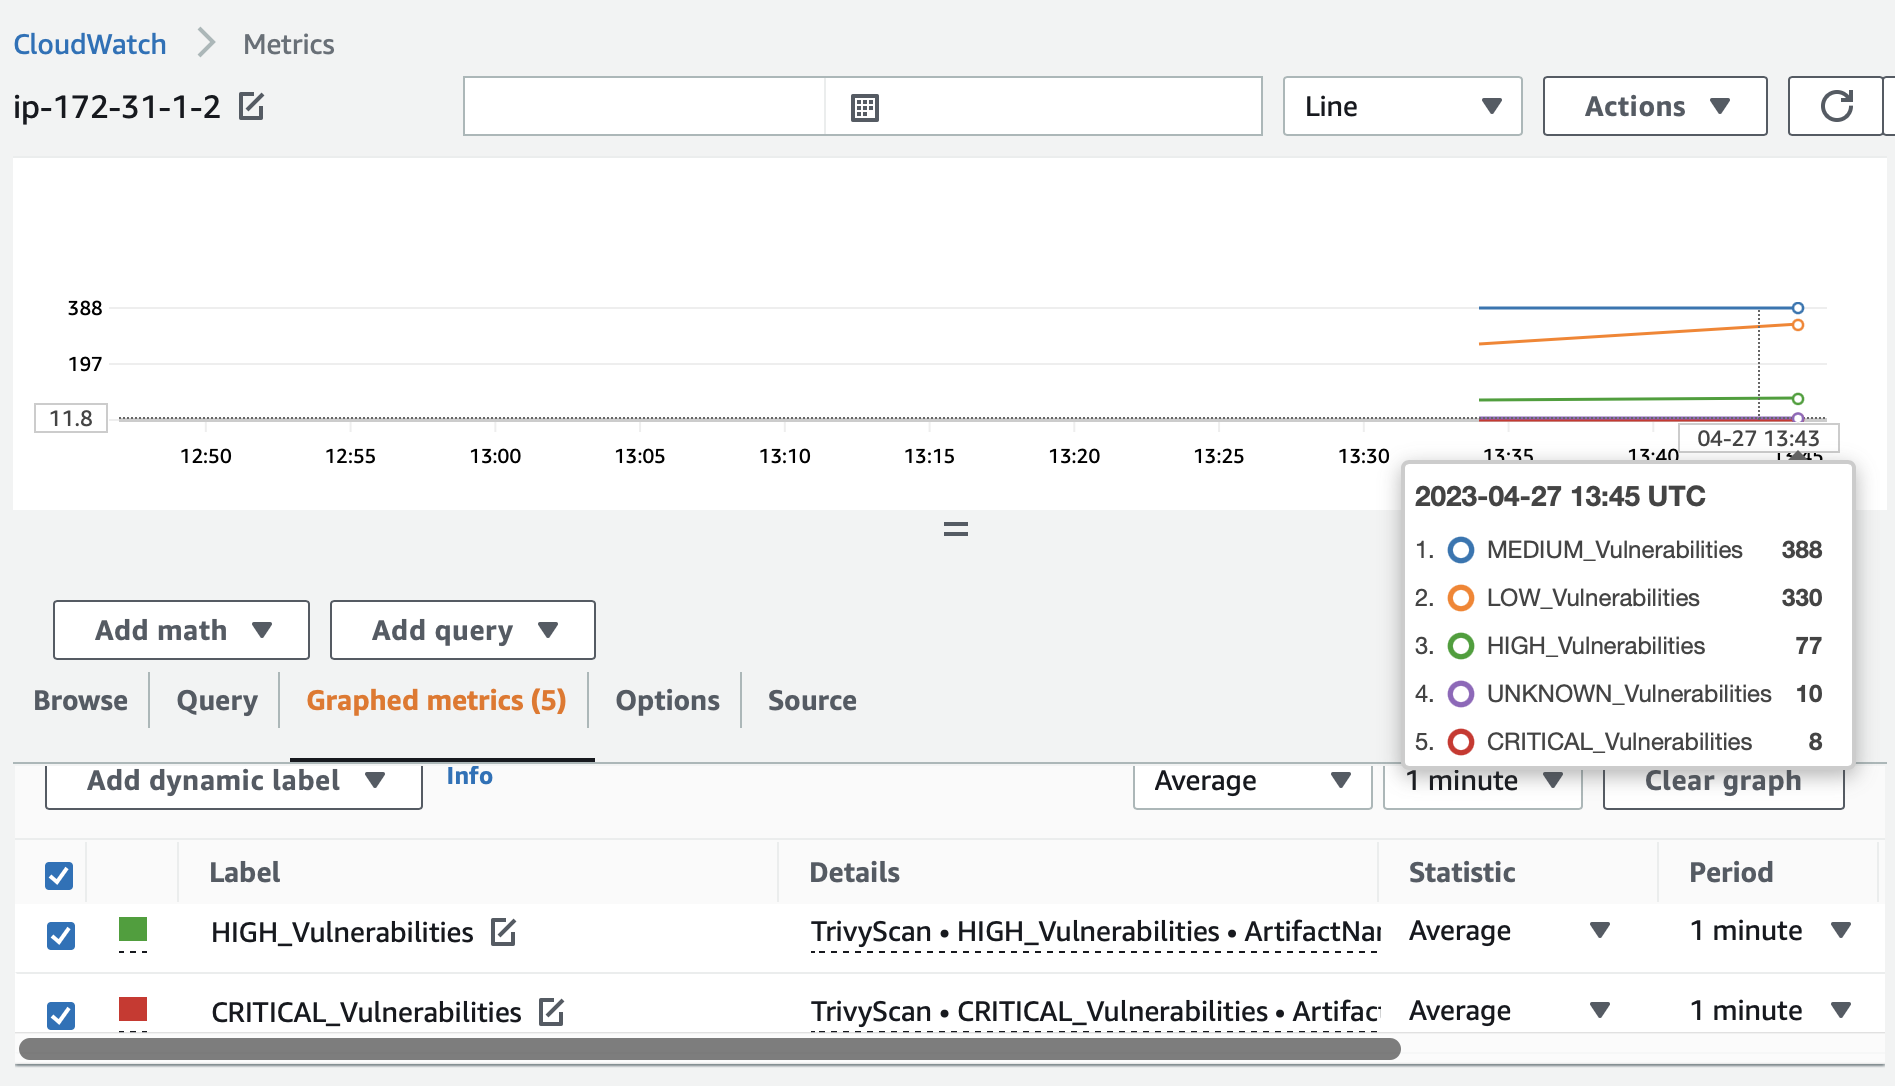
The CloudWatch metrics changed slightly as I did the apt upgrade on the
system.
E-mail notifications
We will use SNS to send e-mail notifications. As the trigger we will use S3
bucket ObjectCreated event. To do this we need to:
- create an SNS topic,
- create a policy that will allow S3 service to call SNS,
- set up the S3 bucket notifications,
- add e-mail subscription.
# The SNS topic...
resource "aws_sns_topic" "trivy-topic" {
  name = "trivy-results"
  delivery_policy = ...
}

# ...where our S3 bucket is allowed to publish messages...
data "aws_iam_policy_document" "sns-s3-policy" {
  statement {
    actions   = ["SNS:Publish"]
    resources = [aws_sns_topic.trivy-topic.arn]
    principals {
      type        = "Service"
      identifiers = ["s3.amazonaws.com"]
    }
    condition {
      test     = "ArnLike"
      variable = "aws:SourceArn"
      values   = [aws_s3_bucket.trivy-results-bucket.arn]
    }
    ...
  }
  ...
}

# ...and S3 bucket is instructed to send events to this SNS topic...
resource "aws_s3_bucket_notification" "trivy-results-notify" {
  bucket = aws_s3_bucket.trivy-results-bucket.bucket
  topic {
    topic_arn = aws_sns_topic.trivy-topic.arn
    events    = ["s3:ObjectCreated:*"]
  }
}

# ...and our email is subscribed to this SNS topic.
resource "aws_sns_topic_subscription" "trivy-topic-email" {
  topic_arn = aws_sns_topic.trivy-topic.arn
  protocol  = "email"
  endpoint  = var.email # Your e-mail in variables
}
All of those things can be found in these two files:
sns.tf
and
bucket.tf.
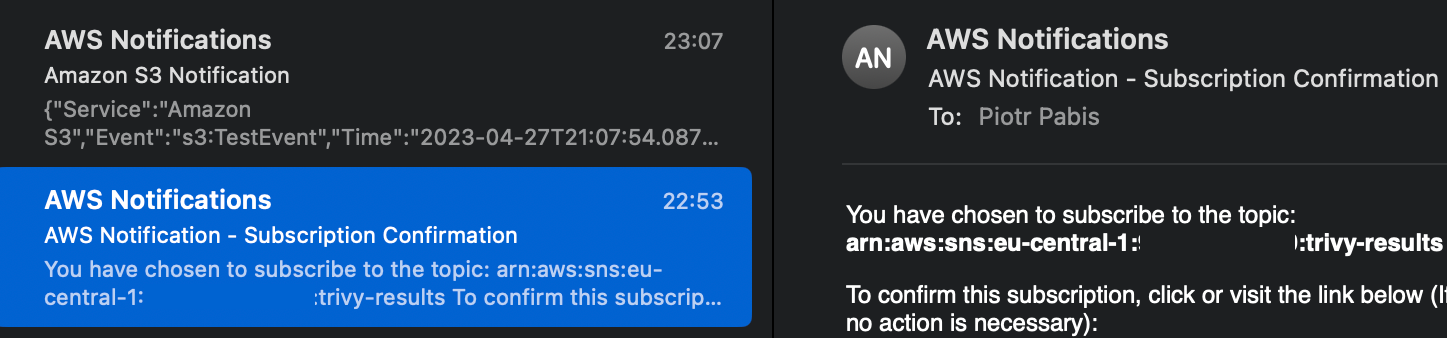
After creating the topic and adding e-mail subscription to it, we should see a confirmation e-mail from AWS with a link we need to click. Also, after creating the notification configuration for S3, it will send a test event to our e-mail. Once we receive it, we can be sure that this setup is working correctly.
Timed scan
Let's set up our instance to be scanned regularly with cron. Ideally, we would
run Trivy as a normal, unprivileged user rather than root. Thus we will put the
scan into the default user's crontab. (This user has sudo access but this is
only for demonstration purposes.) According to the plans, we want to run the job
every day at 4:15 AM. We also need to specify the region for the Python script
to work. For testing, we can also set the cron pattern to */2 * * * * to run
it every two minutes but once you are sure it works, change it to the desired
value not to fill your mailbox.
$ crontab -e
AWS_DEFAULT_REGION=eu-central-1

15 4 * * * /usr/local/bin/trivy rootfs / --scanners vuln --format json --output /tmp/scan.json && /usr/bin/python3 /usr/local/lib/process-results.py /tmp/scan.json && rm /tmp/scan.json
This cron job is also installed by the Ansible playbook.
We should receive more emails from SNS that the object in S3 bucket changed.

That way we can observe our instances for vulnerabilities. It is useful for both creating current inventory, as well as being notified if some new vulnerabilities emerged during code deployment or unattended upgrades.