Recover SSH Access on AWS EC2 Instance
01 October 2023
I recently started learning for AWS Security Specialty with Stephane Maarek's course and was surprised that such basic problem as losing SSH access was not needed for SysOps Administrator. However, it was exciting to see all the possible methods that are available to resolve this issue. Today, I will try out some of them.
Create an EC2 Instance and SSH keys
Let's create an EC2 instance with Amazon Linux 2023. I will define it in Terraform. But before that I will create a key pair that will be used only for this instance and delete the private key to do the challenge of recovering SSH access.
$ ssh-keygen -t ed25519 -f ./id_testkey
In Terraform (or OpenTofu if you prefer) we will define the key pair and EC2 instance to start. Currently it will allow wide access to SSH to the outside from security groups perspective and will have no IAM role, so it won't connect to Systems Manager for now.
resource "aws_key_pair" "test-kp" {
  key_name   = "key-to-delete"
  public_key = file("./id_testkey.pub")
}

data "aws_vpc" "default" { default = true }

resource "aws_security_group" "test-instance-sg" {
  name   = "TestInstanceSG"
  vpc_id = data.aws_vpc.default.id
  ingress {
    description = "SSH everywhere"
    from_port   = 22
    to_port     = 22
    protocol    = "tcp"
    cidr_blocks = ["0.0.0.0/0"]
  }

  egress {
    description = "Allow all outbound traffic"
    from_port   = 0
    to_port     = 0
    protocol    = "-1"
    cidr_blocks = ["0.0.0.0/0"]
  }
}

# This is much more convenient than `data "aws_ami"` [:
data "aws_ssm_parameter" "amazonlinux-latest" {
  name = "/aws/service/ami-amazon-linux-latest/al2023-ami-kernel-6.1-arm64"
}

resource "aws_instance" "al2023" {
  ami                    = data.aws_ssm_parameter.amazonlinux-latest.value
  instance_type          = "t4g.micro"
  vpc_security_group_ids = [aws_security_group.test-instance-sg.id]
  key_name               = aws_key_pair.test-kp.key_name
  tags                   = { Name = "ssh-test-instance" }
}

output "public-ip" {
  value = aws_instance.al2023.public_ip
}
Apply this plan and connect to the instance with the key we created.
$ terraform apply
$ ssh -i ./id_testkey ec2-user@$(terraform output --raw public-ip)
We should be greeted with shell prompt of ec2-user. So, now let's do the
crazy part.
$ rm id_testkey
Recovering using EC2 Instance Connect
As we don't have private key anymore we need to find a solution to connect. We
defined our security groups to open SSH to the wide world. If you decided to
create a more restrictive policy, go to
https://ip-ranges.amazonaws.com/ip-ranges.json
and look for service EC2_INSTANCE_CONNECT with your region. For example for
eu-central-1 it is this CIDR block: 3.120.181.40/29. Add it to your security
group, log in to AWS Console and try connecting with EC2 Instance Connect. It is
a public service so your instance must have public IP.


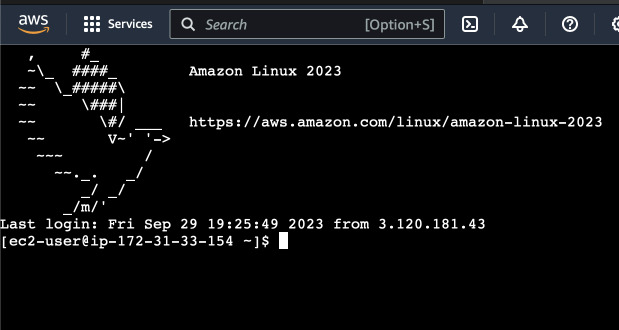
Great we are in! But not all instances have EC2 Instance Connect installed. So, let's break this instance. Elevate your privileges to become root and edit SSH daemon configuration. Delete the lines that instruct SSH to use EC2 Instance Connect and restart the service.
$ sudo su
$ cd /etc/ssh/
$ tail -n3 sshd_config

AuthorizedKeysCommand /opt/aws/bin/eic_run_authorized_keys %u %f
AuthorizedKeysCommandUser ec2-instance-connect
$ sed -i 's/^AuthorizedKeysCommand/#AuthorizedKeysCommand/' sshd_config
$ sed -i 's/^AuthorizedKeysCommandUser/#AuthorizedKeysCommandUser/' sshd_config
$ tail -n3 sshd_config

#AuthorizedKeysCommand /opt/aws/bin/eic_run_authorized_keys %u %f
#AuthorizedKeysCommandUser ec2-instance-connect
$ systemctl restart sshd
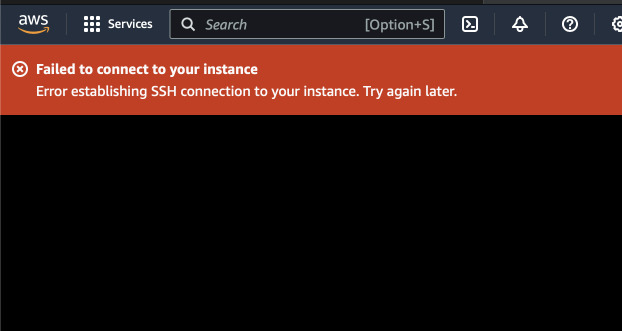
Close this EC2 Instance Connect session and try again with EC2 Instance Connect.

Recovering using SSM Session Manager
If you have permissions to manage IAM policies and roles, you can set up this instance to use IAM role to be able to register to Systems Manager. In Terraform we can do it this way.
resource "aws_iam_role" "ssm-ec2-role" {
  name               = "ssm-ec2-role"
  assume_role_policy = <<-EOF
  {
    "Version": "2012-10-17",
    "Statement": [ {
      "Action": "sts:AssumeRole",
      "Principal": { "Service": "ec2.amazonaws.com" },
      "Effect": "Allow"
    } ]
  }
  EOF
}

resource "aws_iam_role_policy_attachment" "ssm-role" {
  role       = aws_iam_role.ssm-ec2-role.name
  policy_arn = "arn:aws:iam::aws:policy/AmazonSSMManagedInstanceCore"
}

resource "aws_iam_instance_profile" "ssm-ec2-profile" {
  role = aws_iam_role.ssm-ec2-role.name
  name = "ssm-ec2-profile"
}

# In the instance resource
resource "aws_instance" "al2023" {
  # ...
  iam_instance_profile = aws_iam_instance_profile.ssm-ec2-profile.name
}
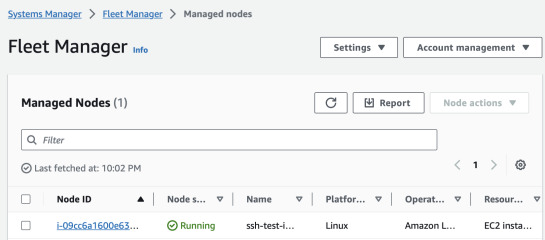
After some time, the instance should show up in SSM Fleet Manager or Inventory. If it doesn't show up after 10 minutes, you can restart the instance or stop and start - it will trigger the SSM Agent to try registering again.

By selecting the instance and clicking "Node actions" -> "Connect" we can get
a shell in the browser. You can also use aws ssm start-session command using
AWS CLI and Session Manager plugin for your PC.

But what if we now disable SSM Agent on the instance? After the commands below, terminate the session and try to connect again. Even after rebooting we will encounter an error.
$ sudo systemctl disable amazon-ssm-agent
$ sudo systemctl stop amazon-ssm-agent

Recovery with user data
Normally user data runs on the first boot of the instance. But we can use
special syntax to make user data a "cloud-config" script. It resembles YAML and
SSM Documents, and runs every instance boot. We can use it to add our newly
created SSH key to ec2-user.
$ ssh-keygen -t ed25519 -f ./id_testkey2
Let's create new file called cloud-config.yaml that will be our user data.
Content-Type: multipart/mixed; boundary="//"
MIME-Version: 1.0

--//
Content-Type: text/cloud-config; charset="us-ascii"
MIME-Version: 1.0
Content-Transfer-Encoding: 7bit
Content-Disposition: attachment; filename="cloud-config.txt"

#cloud-config
cloud_final_modules:
- [users-groups,always]
users:
  - name: ec2-user
    ssh-authorized-keys:
      - ${ssh_public_key}
We will use Terraform's template function to load the public key into the YAML file and attach it to the instance.
resource "aws_instance" "al2023" {
  # ...
  user_data = templatefile("./cloud-config.yaml", {
    ssh_public_key = file("./id_testkey2.pub")
  })
}
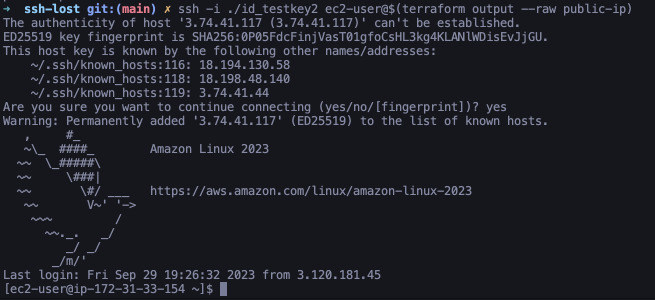
Apply the plan and wait for the instance to boot. If you use Terraform outputs, apply again to synchronize public IP (it will probably change because user data can only be updated when instance is stopped). Now we should be able to access our instance again!
