Using YubiKey TOTP for AWS CLI Multi-factor Authentication
3 July 2025
If you follow my blog, you probably know that I am huge fan of YubiKeys. I tinker with them a lot. One of the most annoying things about multi-factor authentication is when you have to get up your butt and go get your phone to open Google Authenticator and get the code. I recently got also Salesforce app for MFA that works with Apple Watch, but I also sometimes leave this one on a charger. What I have always near me is my YubiKey. Knowing that it has 32 slots for TOTP secrets, why not use it? Today, we will do exactly that.
Extracting TOTP
If you are fine with creating a new OTP secret for AWS, you can skip this section. However, I don't want to change everything I have set up already and reuse the old code. Google Authenticator doesn't generate QR codes from the original secret but it can create QR codes for exporting and importing to and from it.
Open your Google Authenticator app, go to settings and select "Export". Take a
screenshot of the code and send it to your computer. Then you can use this tool
I prepared to extract the TOTP secrets with --print option:
https://github.com/ppabis/otp_extractor.
Alternatively, you can use the original project that can scan the QR code from
your webcam but then you have to modify it to print otpauth:// URL:
https://github.com/scito/extract_otp_secrets.
Once you have the URLs, save them somewhere safe and delete after you have added
them to your YubiKey.
Creating new MFA in AWS Console
If you want to do this exercise with a new MFA, we can do it either via CLI or using AWS Console. We will first do it via Console and then I will present you a simple script that will do it in CLI easily.
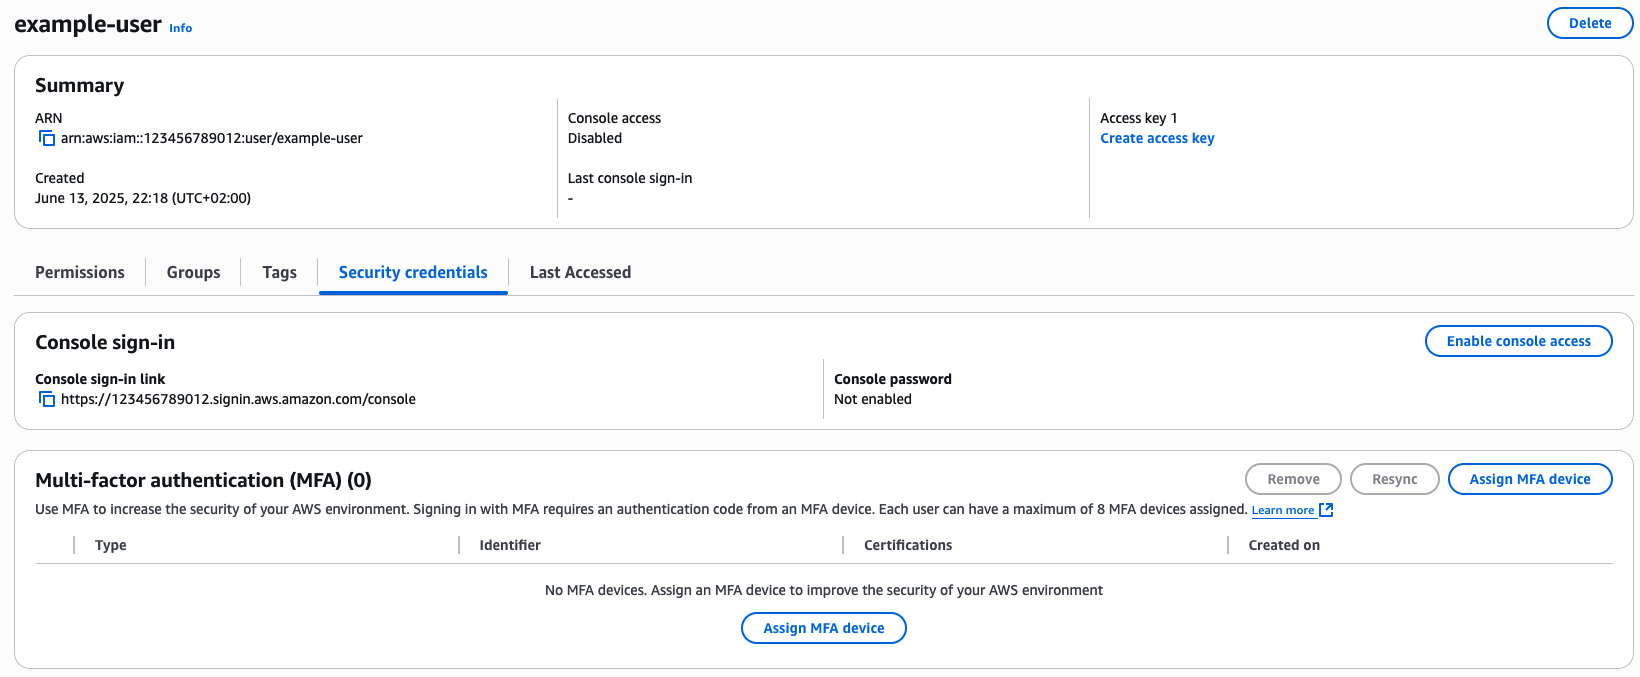
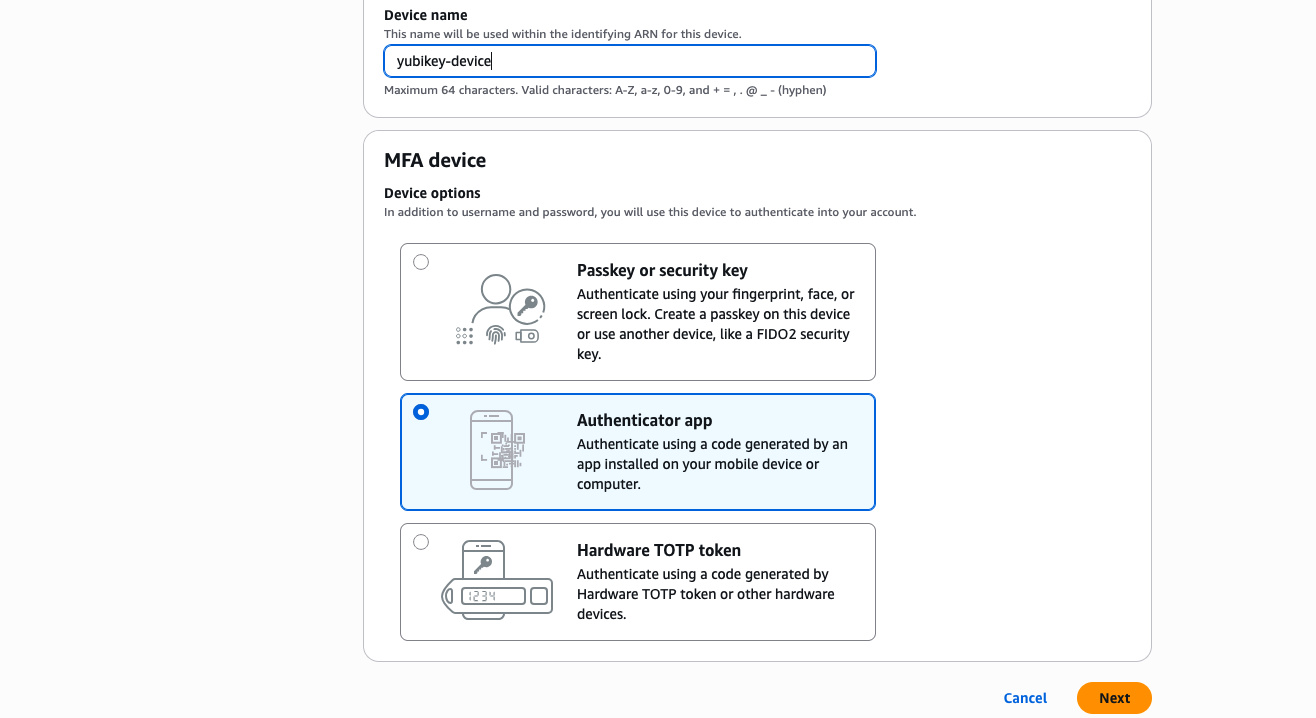
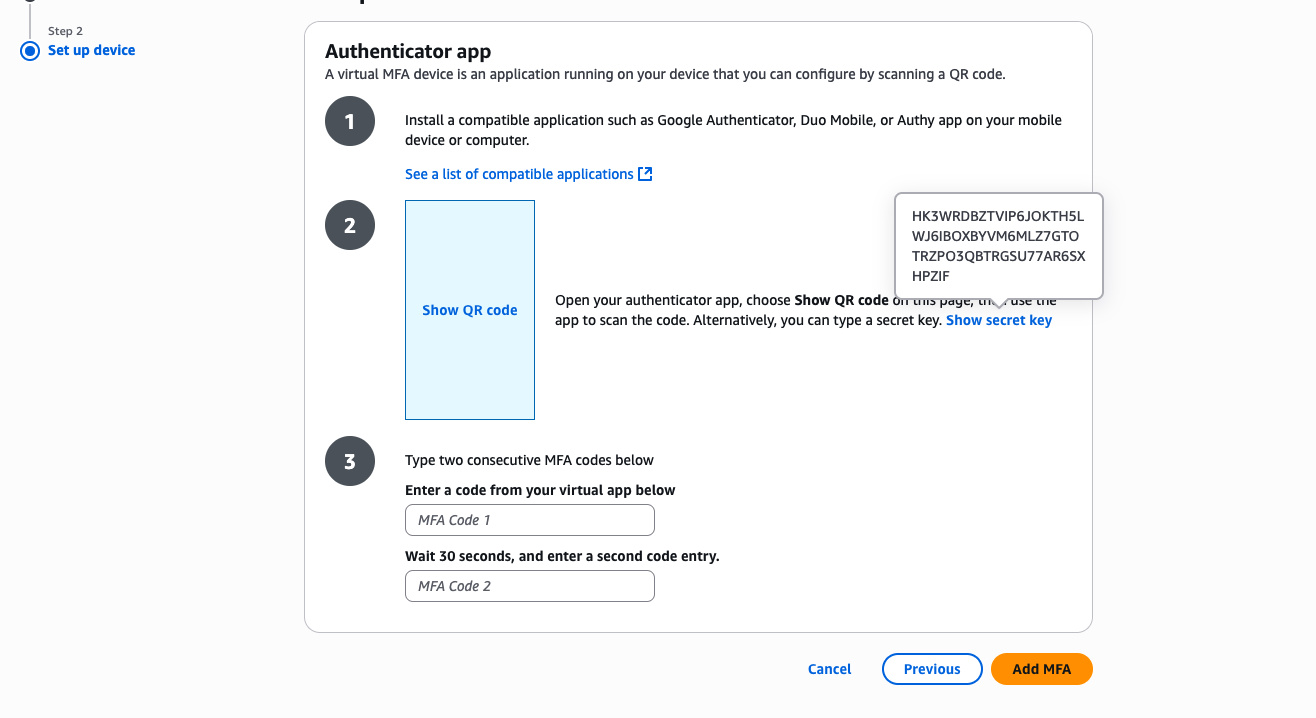
Go to the AWS Console, search for "Identity and Access Management" in the search bar and go there. On the left panel select "Users" and find the user you want add a new MFA for. Click on the user, go to "Security credentials" tab. Click "Assign MFA device" button. Select type of "Authenticator app" and click "Next". You don't need the QR code, instead select "Show secret key" and copy it.

Now as you have the secret, it's time to program our YubiKey. Open the terminal
and run the following command to add a TOTP secret. I will use AWS as the
issuer. The token has to be generated from SHA-1 hash and generate 6 digits. I
will also require physical button press to generate the code. Everything else
leave as default. In case your YubiKey OATH is password protected, you will also
need to provide the password. Paste the secret key after prompt.
$ ykman oath accounts add \
 --issuer AWS \
 --oath-type TOTP \
 --digits 6 \
 --algorithm SHA1 \
 --touch \
 example-user
Enter a secret key (base32): RV7CXS4DFS2E3SO5WYOBFMCXGRP26PTDK6WAEHZFAOIJIQ66LDYGLQ7LUCLT5U5F
OATH account added.
Now you need to generate the code. If this is the only TOTP you have on YubiKey,
you can just use ykman oath accounts code to get the code. If you have more,
you need to specify the query, for example account name:
ykman oath accounts code example-user. If you also decided to use touch for
code generation, you will be prompted. Do the same thing in 20 or 30 seconds
(the code should be different). Provide both codes to the AWS Console (do it
quickly enough to sync the clock).
$ ykman oath accounts code example-user
Touch your YubiKey...
AWS:example-user  597111
Newer YubiKeys have 32 slots for OATH secrets, newer ones have 64. Use
ykman info to get firmware version. If the firmware starts with 5.7 you have
64 slots. If you need space, you can delete the account using
ykman oath accounts delete AWS:example-user.
Creating new MFA through CLI
In the above example, you had to go through many manual steps to create the MFA device. However, we can create a script that will do it automatically for us. The only thing you will need to do is to press the key if you want this requirement. As long as you are already authenticated to AWS in your terminal, for example with access keys or a role assumed, you can run the following command.
SEED_FILE=$(mktemp)

MFA_RESPONSE=$(aws iam create-virtual-mfa-device \
 --virtual-mfa-device-name yubi-oath \
 --bootstrap-method Base32StringSeed \
 --outfile $SEED_FILE)
echo $MFA_RESPONSE   # Hopefully this command succeeded.

MFA_SEED=$(cat $SEED_FILE)
rm $SEED_FILE
MFA_ARN=$(echo $MFA_RESPONSE | jq -r '.VirtualMFADevice.SerialNumber')
So now in variables MFA_SEED and MFA_ARN we have the secret key and ARN of
the new MFA device. Next step is to add the secret to YubiKey. We do it the same
way as before but we provide the secret immediately in the command.
$ ykman oath accounts add \
 --issuer AWS \
 --oath-type TOTP \
 --digits 6 \
 --algorithm SHA1 \
 --touch \
 example-user-cli \
 ${MFA_SEED}
OATH account added.
Now we need to generate the codes and associate the device with a user. We can
do this pretty easily. If you added --touch option, you need to be present 😉.
Just after we catch the codes, we can enable the device with AWS CLI. We will
use grep to get just the code.
echo "Getting code 1..."
CODE1=$(ykman oath accounts code example-user-cli | grep -oE '[0-9]{6}$')
echo "Sleeping for 30 seconds"
sleep 30
echo "Getting code 2..."
CODE2=$(ykman oath accounts code example-user-cli | grep -oE '[0-9]{6}$')
echo "Enabling MFA device..."
aws iam enable-mfa-device \
 --user-name example-user \
 --serial-number ${MFA_ARN} \
 --authentication-code1 ${CODE1} \
 --authentication-code2 ${CODE2}
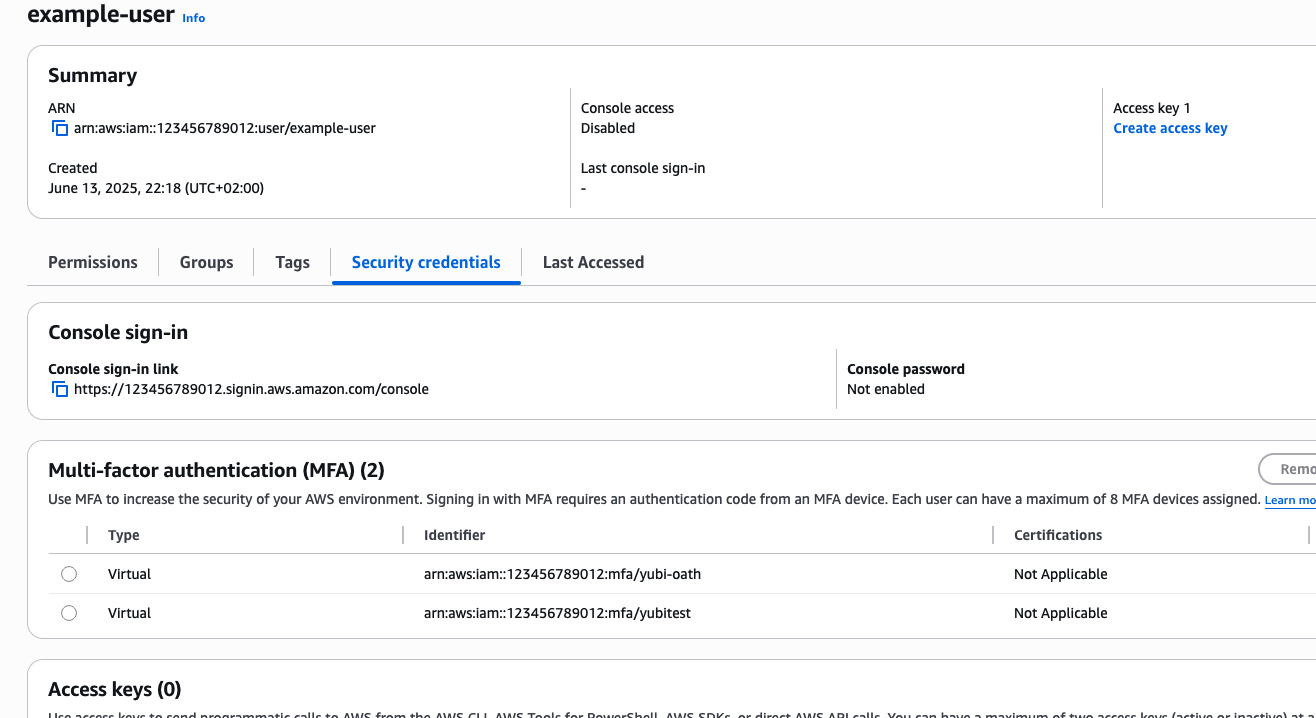
I didn't get any errors, so it seems that it has worked and I was quick enough to press the button 😄. We can verify this in the AWS console - indeed, I have two MFA devices assigned now to the user.
Using the MFA in AWS CLI
In order to use the MFA in AWS CLI, you need to get a new STS session
credentials. You can enforce sessions with MFA with
this IAM policy. For
the CLI command to work, you also need Access Keys from AWS Console (or CLI
using aws iam create-access-key --user-name example-user). Be sure that during
get-session-token you use access key ID and secret access key from the user's
credentials, not anyone else.
$ unset AWS_SESSION_TOKEN
$ JSON_TOKEN=$(aws sts get-session-token \
 --serial-number ${MFA_ARN} \
 --token-code $(ykman oath accounts code example-user-cli | grep -oE '[0-9]{6}$') \
 )
Touch your YubiKey...
$ export AWS_ACCESS_KEY_ID=$(jq -r '.Credentials.AccessKeyId' <<< $JSON_TOKEN)
$ export AWS_SECRET_ACCESS_KEY=$(jq -r '.Credentials.SecretAccessKey' <<< $JSON_TOKEN)
$ export AWS_SESSION_TOKEN=$(jq -r '.Credentials.SessionToken' <<< $JSON_TOKEN)
$ aws sts get-caller-identity
{
    "UserId": "AIDA2ABC123ABC123DEF1",
    "Account": "123456789012",
    "Arn": "arn:aws:iam::123456789012:user/example-user"
}
Summary
Use your YubiKey to the fullest! After all, you paid for it and it is another object that you have in your home, that occupies your mental space, so why waste it? Just as you don't buy a MacBook Pro to just browse the web 🤔.